How to configure invoices and receipts for Delegate Registration
This article will show you how to configure invoices and receipts for delegates of your event.
Please Note: This information is for Admins only!
Skip to:
How To Resend Invoices & Receipts
From your dashboard, click on Registration → Tickets → Finance
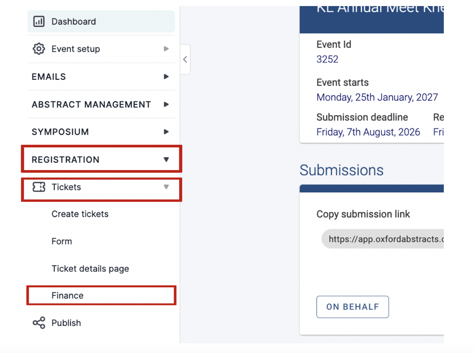
On the next screen, select Payment Providers from the tab at the top, then click on the Configure Invoice & Receipts button at the top-right of the screen.

A screen will appear to the right, and on it, you will find two tabs. General Content and Delayed Payments.
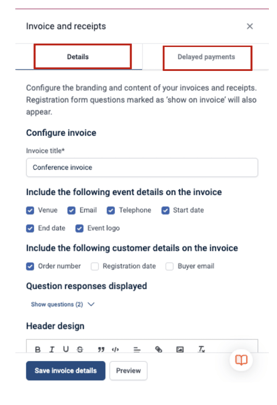
General content
This is for online invoices and receipts generated from your chosen payment provider (Paypal, Stripe, Authorize.net).
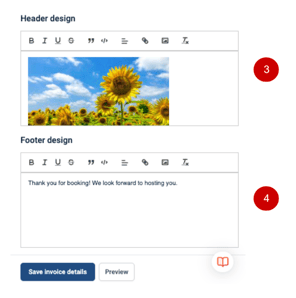
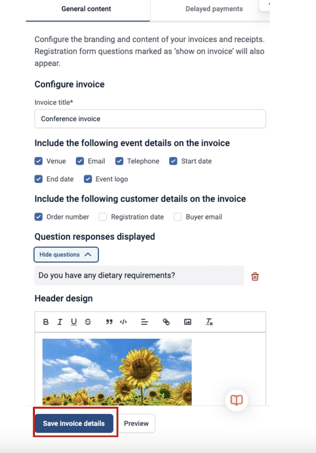
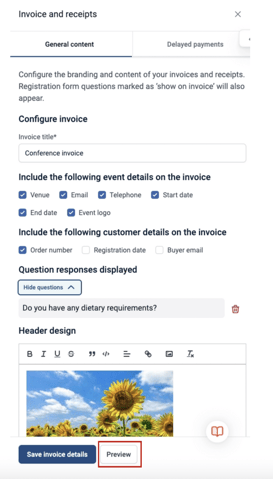
You can add the title of the invoice (1) and select the boxes to include what information and customer details you’d like to show on the invoice and receipt (2), as well as including a header design (picture) (3) and footer information (4).
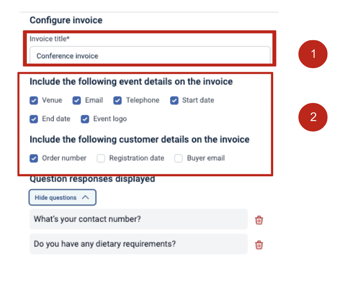
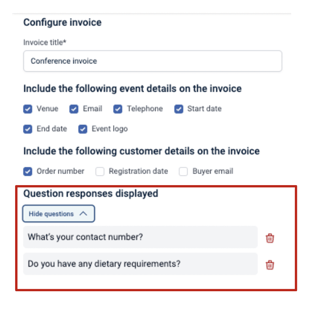
You can also add questions and delegates' responses from the form delegates have answered onto the invoice.
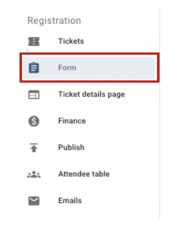
To do this, go to the Form section under Registration in the left-hand menu.
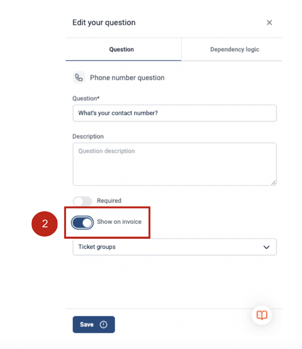
Then click on the question you want to show on the invoice (1) - toggle on Show on Invoice (2), and then click Save.

On the Form screen you will notice under the questions that have been selected on the invoice, it will say ‘On Invoice’.

When complete, click the Save Invoice Details button at the end of the page.
Delayed Payments
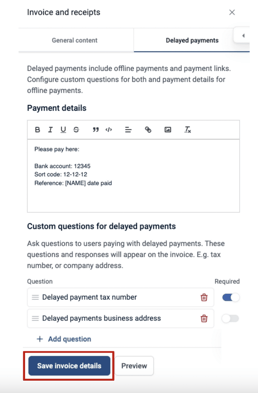
This tab is for offline invoices and payment links.
To set up this, we need you to add a fee collection card so we can collect the money you owe.
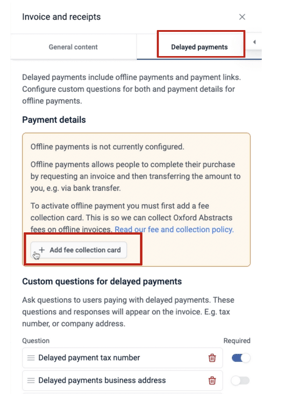
When you click on the Add Fee Collection Card it will automatically take you to Stripe to input your information.
Follow the instructions on Stripe and when completed come back to the set up page.
You will now see that your details have been added.
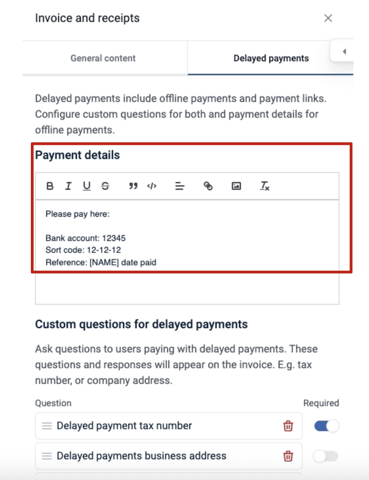
Next, you need to add questions you would like recipients to answer that will be included on the invoice.
These questions will be asked in the payment flow your delegates go through when purchasing a ticket via an offline payment or with a payment link.
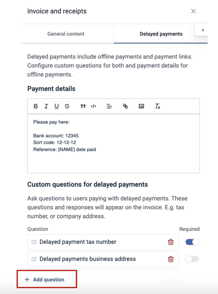
Click on Add questions to add your question and then click Save.
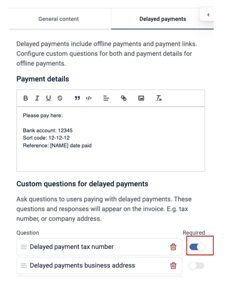
When you have added your questions, make sure the toggle next to the question is
‘ON”.
When complete, click on the Save Invoice Details button.
To preview what your invoice will look like, click on the Preview button at the bottom of the page.
A new tab will open on your browser with your invoice/receipt preview.
How To Resend Invoices & Receipts
To resend an invoice or a receipt from your dashboard, click on Registrations on the left-hand menu and then click Registrations from the drop down menu.

Click on the attendee you are wanting to resend too, by either finding then via the search bar or scrolling through the table.
A screen will pop up on the right-hand side.
Click on the Email Button under Total Paid and click either Receipt or Invoice.

On the next screen you can preview the email being sent by clicking on the down arrow, before you click the Send Button to send to the recipient.

If you require further help then please get in contact with our Support Desk via this Contact Form.