
Please note: This information is for Admins only!
For an overview of the certificate feature take a look at the video below, or continue reading for full written instructions.
Skip to:
How to create a recipient list
How to edit the recipient list table
How to create custom recipient lists
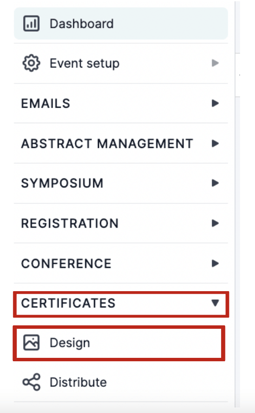
From your Event Dashboard, scroll down to the Certificate section in the left-hand column and click on Design to create your certificate.
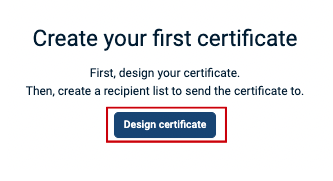
Next, click on the Design Certificate Button found in the middle of the page.
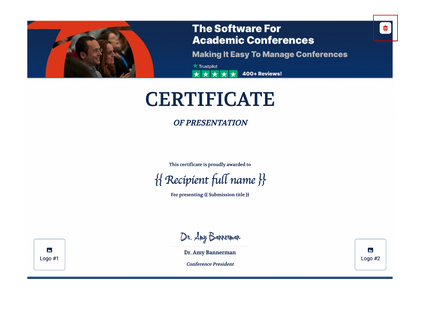
On the next screen to the left of the preview screen, you will see your editing column (1); on the right, you can preview what your certificate will look (2) like while editing it.
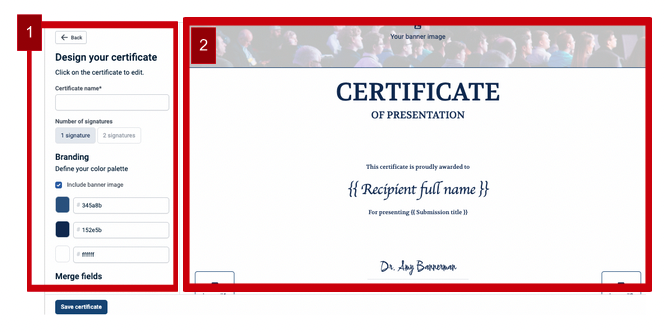
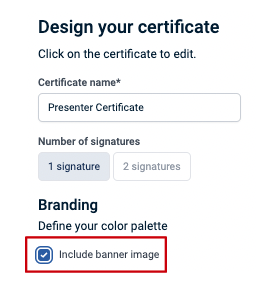
Name Certificate
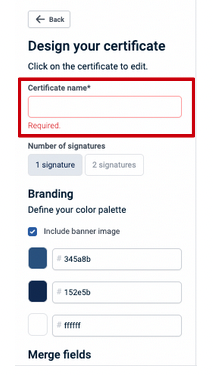
To start, give your certificate a name by typing it into the Certificate Name box at the top of the editing column.
Add Signature
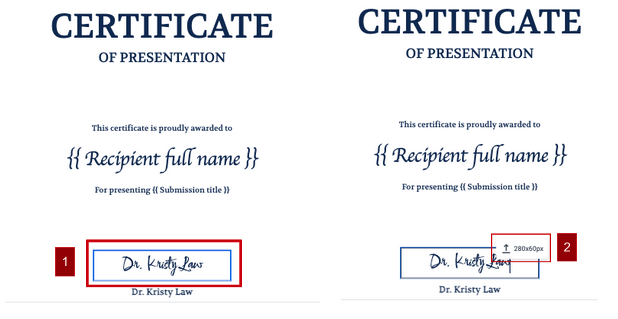
Next, select whether you want one or two signatures on the certificate.
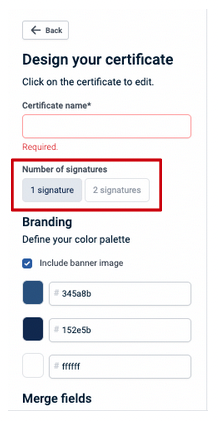
If you wish to have one signature, you can type this on the preview screen to the right (1), or you can upload a signature by clicking on the signature box on the preview screen (2).
You can edit any text on the certificate preview screen by clicking on the area you wish to change.
Add Logo
You can also upload up to two logos by clicking on the logo sign - bottom left and bottom right of the preview screen.
Logos need to be the size of 160x160px.
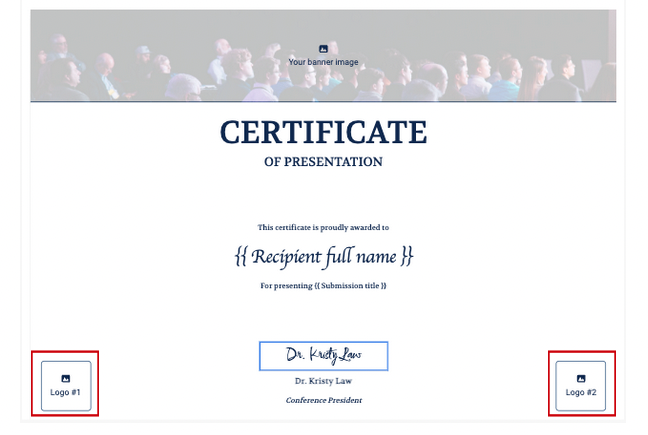
You can choose the placement of your logos on the design panel to the left. You can choose to have the logos at the bottom or top of the page or to have no logos at all.
Simply click on the box you wish for your logo placement.

Add Banner Image
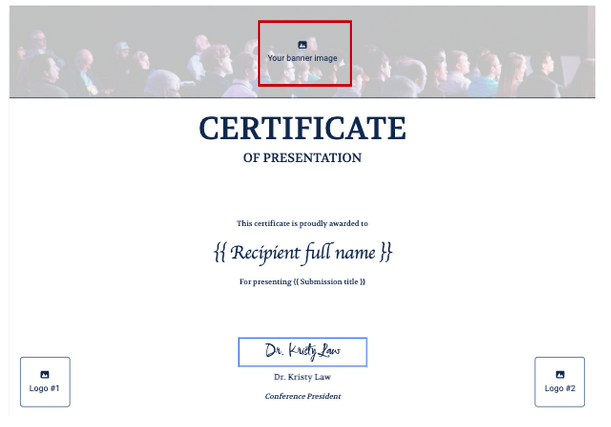
You can upload a banner image too.
Click on the Your Banner Image at the top of the Certificate Preview Screen and upload the image you want to add.
Banner images need to be a size of 1170 x 185px.
You’ll then be able to move it around to get the picture into the place you want it.
If you need to delete the banner image, click the button at the top right.
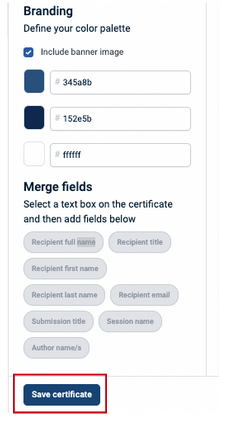
If you do not want to include a banner image on your certificate, then untick the box under branding in the editing column.
Change Fonts
You can choose from a variety of fonts for your certificates, from the drop down menu on the design panel.
Choose fonts for your Main Text, Recipient Name and Signatures.

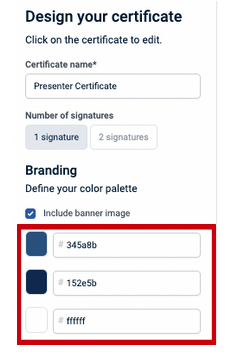
Define Colour Palette
In the editing column, you can add your organisation's colours by adding the colour code to the boxes under Branding.
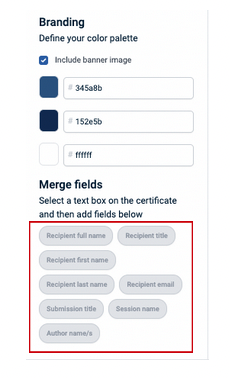
Add Merge Fields
Merge fields are a quick and easy way to add information to the certificate, for example, first and last names.
To add merge fields, click on the ones you want to add from the selection in the editing column.
When you are happy with your certificate, click the Save Button at the bottom of the editing column.
You’ll then have a pop-up window appear asking if you would like to create your recipient list or if you want to skip it for now.

Whichever option you make, your certificate will be saved, and you can go back to it and edit it or copy it at any time if you need to, delete it and distribute the list to your recipients.
How to create a recipient list
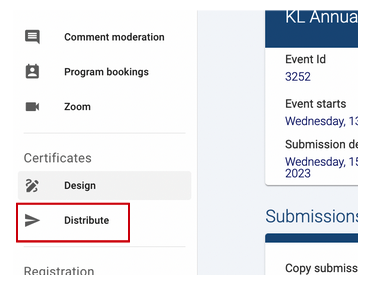
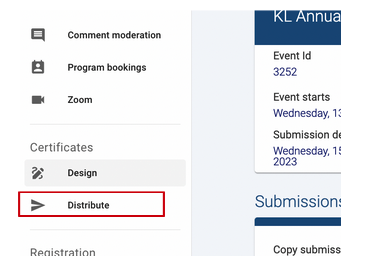
If you have already created your certificate template, from here, you can click on Add Recipient, or you can select Distribute under Certificates in the left-hand column.
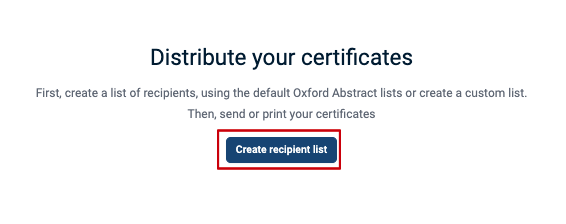
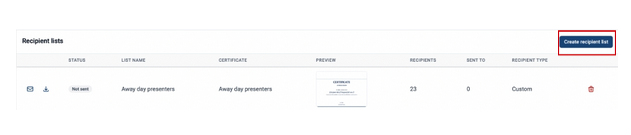
On the next screen click on the Create Recipient List button.
This will bring up a column to the right of the page where you can (This is the same column you’ll see if you click on Create Recipient List on the pop-up when you have saved your certificate template).
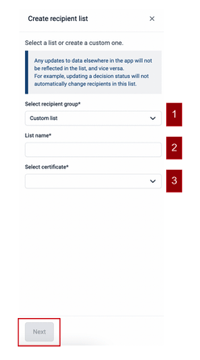
You’ll need to do the following:
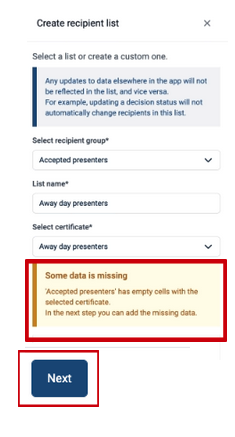
- Select a Recipient group (1) from the drop-down box (for example, presenters, authors) that you want to send the certificate too
- Name the recipient list you’re creating (2)
- Select which certificate (if you have multiple templates) you wish to associate the recipient list to (3)

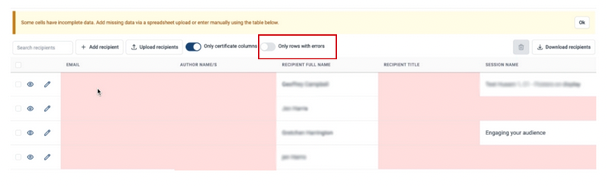
A warning message will appear if any data is missing in the Recipient group you choose.
Click Next, and this will take you to a table showing what data is missing (in red).
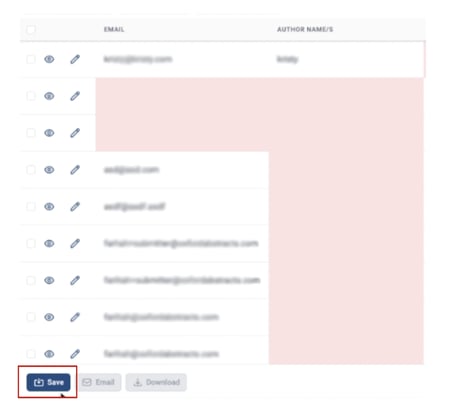
Recipient List Table
Each row is a recipient, and each column header is a merge field used in your certificate.
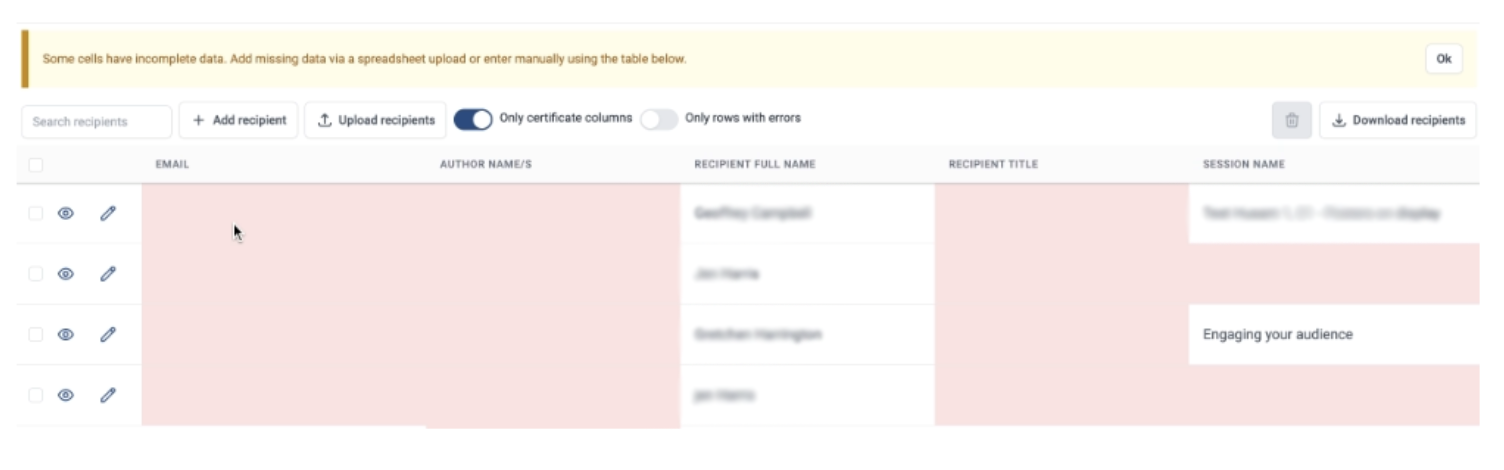
Anything in Red shows that there is data missing.
You can manually add/edit information by clicking in the pencil to the left of the recipient email and then clicking on the relevant box under the relevant merge field.
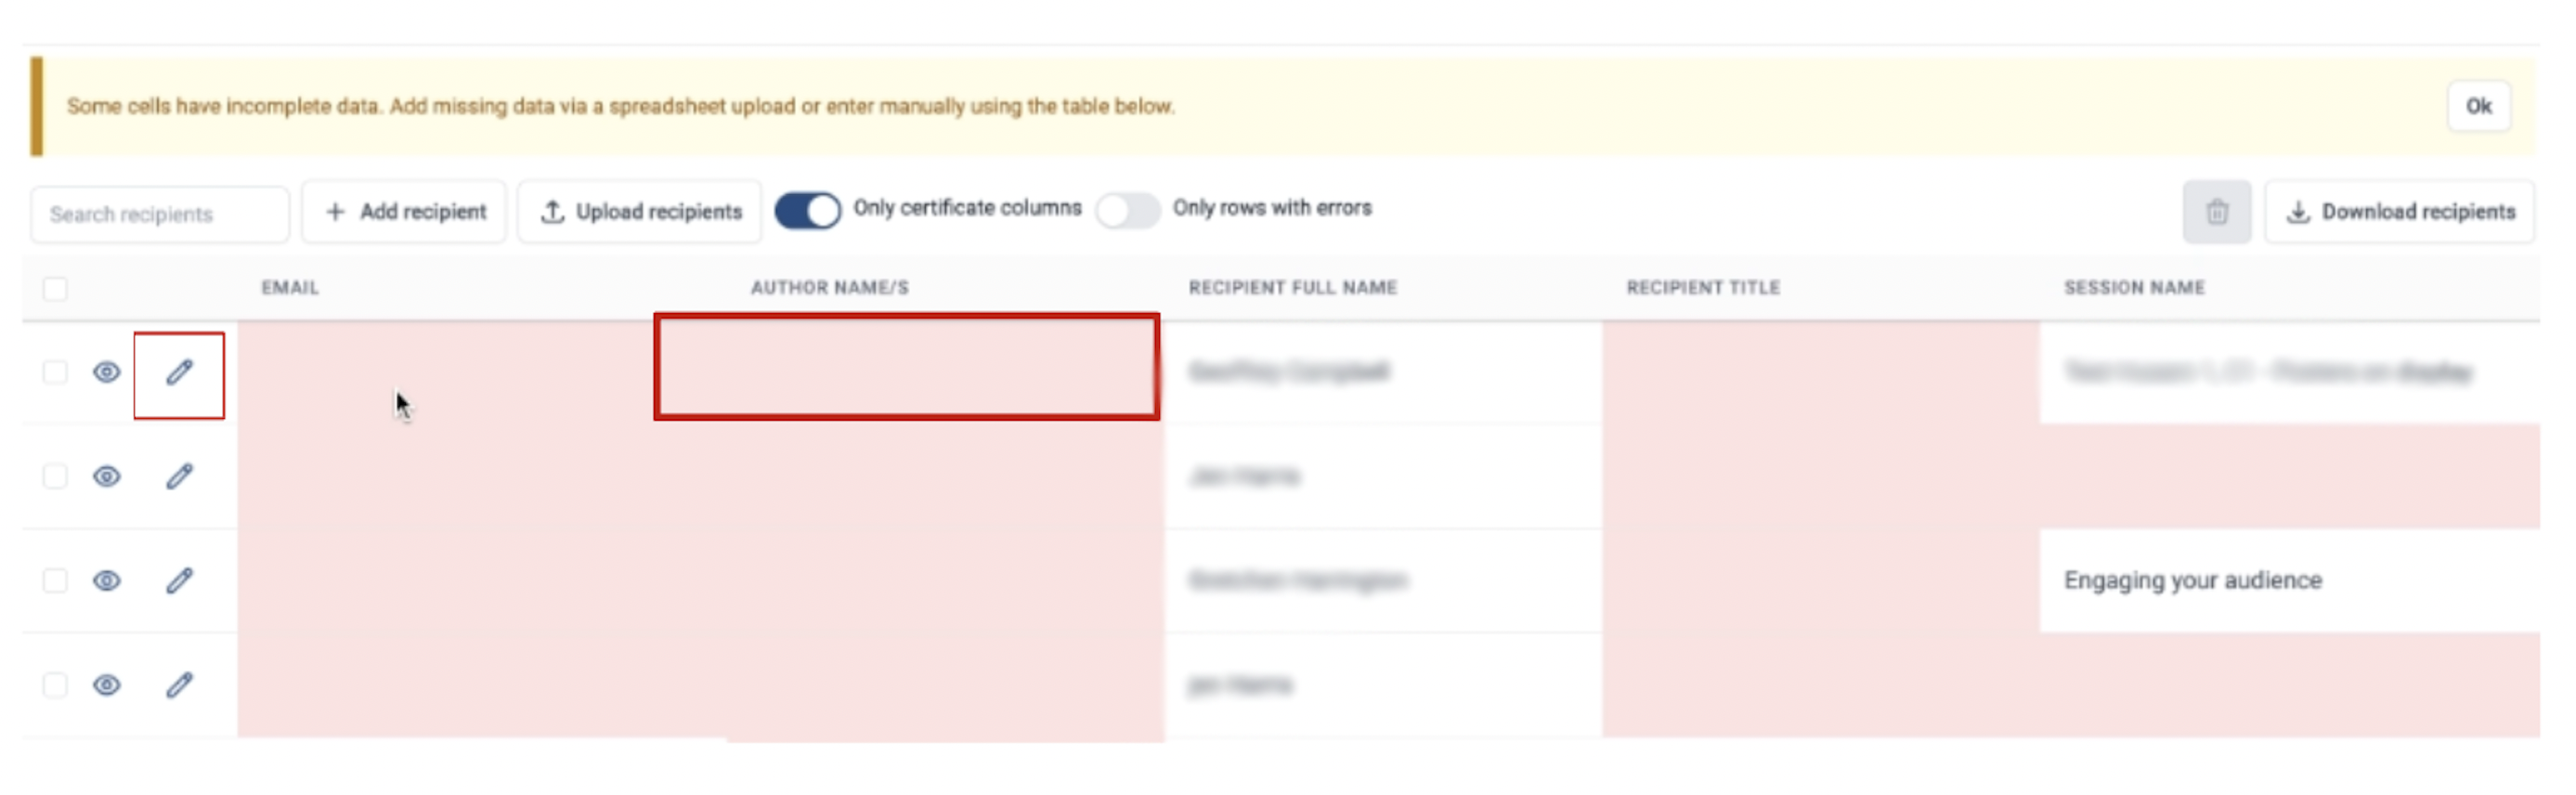
To save any changes you have made, click on the green tick to the left of the recipient email address (where you clicked to edit the information).

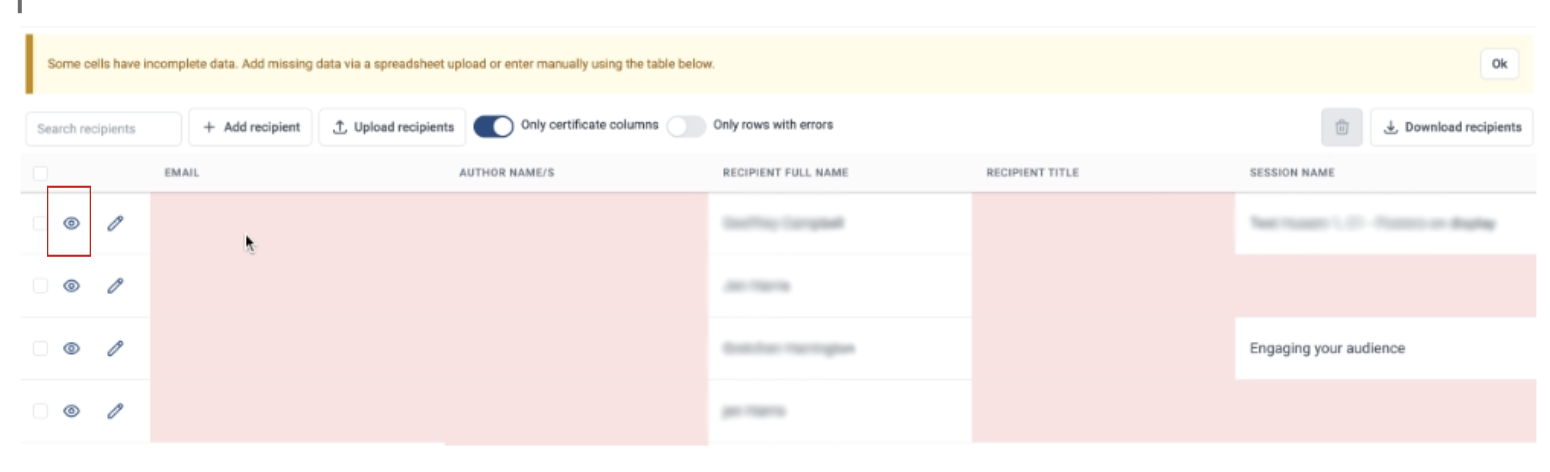
You can preview what the certificate will look like for a specific recipient by clicking on the button to the left of their email address column, next to the edit (pencil) button.
On this table, you can manually add recipients by clicking the + Add Recipient button at the top.
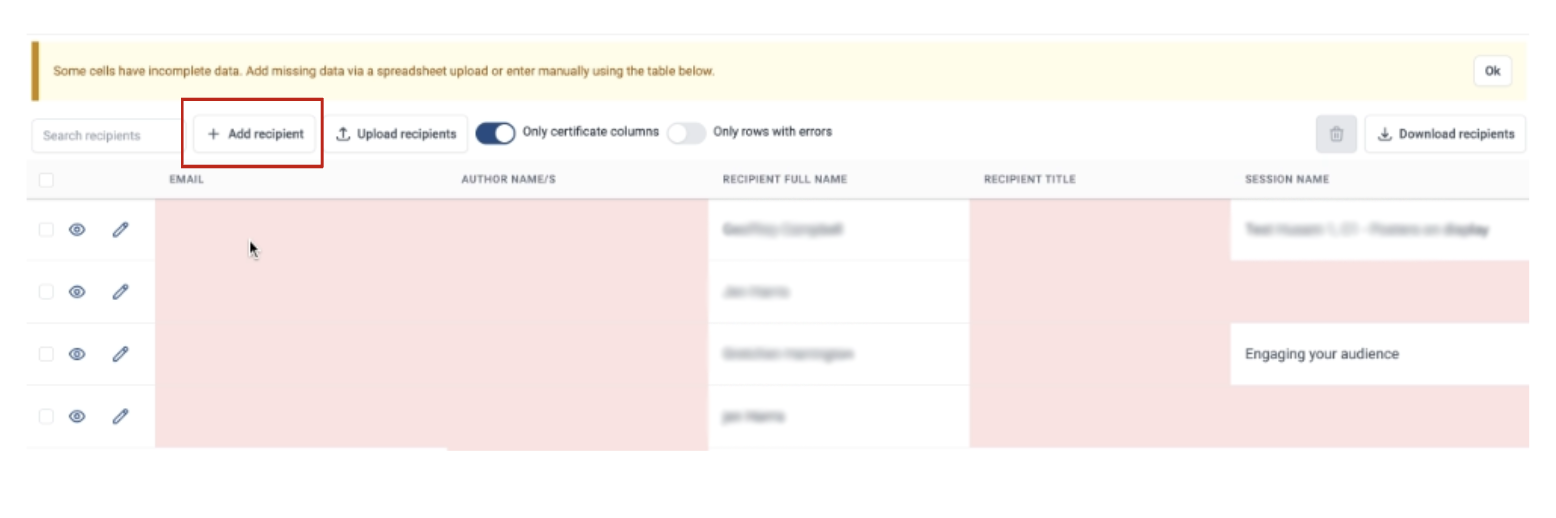
Add their details and then click on the green tick to the left of their email address column.

You can toggle on the “only row with errors’ to show only the rows missing information that you need to add.
You can delete individual recipients by selecting the box to the left of the row next to the eye button you are wanting to delete and then clicking on the delete button at the top right of the table.
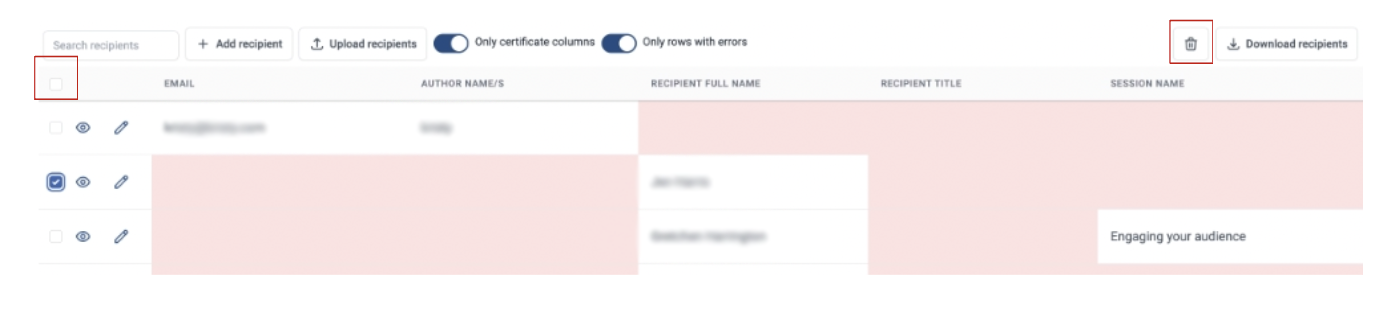
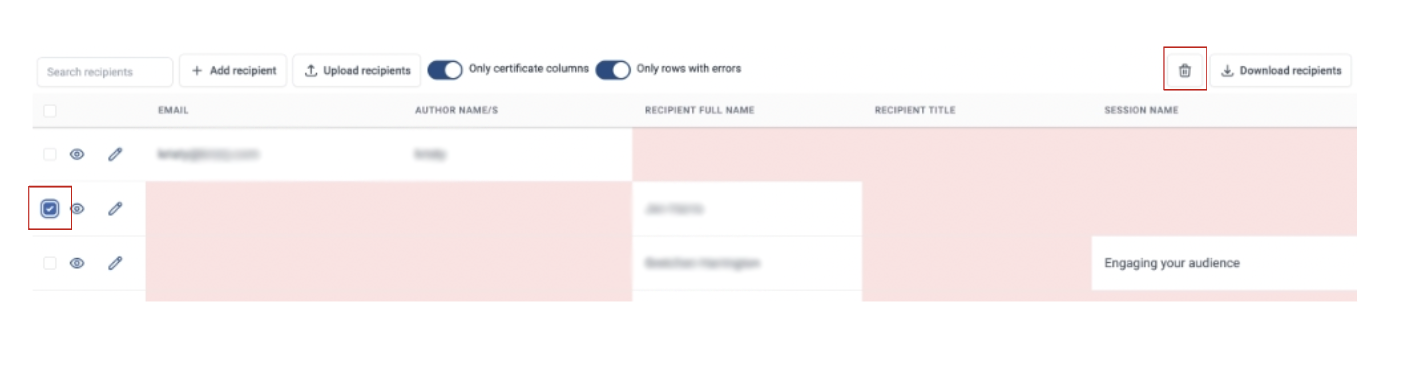 You can also delete all recipients by clicking on the box at the top left of the table and clicking the delete button at the top right of the table.
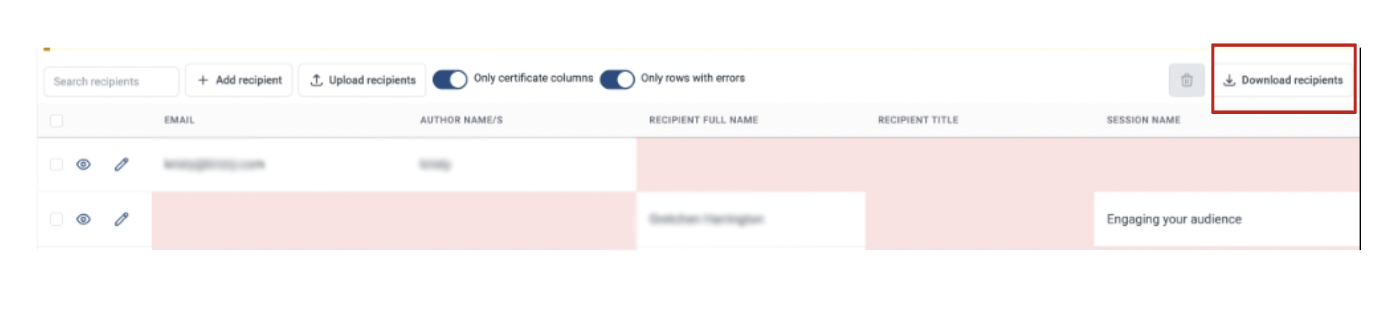
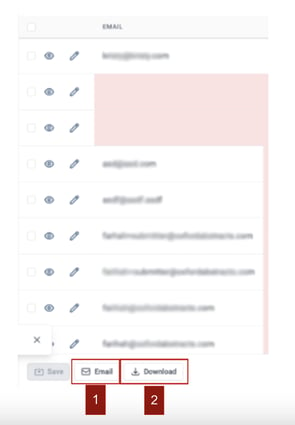
You can download the recipient list by clicking the Download Recipients button at the top right of the table. This will download as a CSV file.
When you are happy with your recipient list, you need to click Save at the bottom left of the table.
You then have two options to choose from:
- You can download all the certificates by clicking on Download
- You can email the certificates by clicking on the Email button to the recipients. If you choose this option, you’ll be able to view the email template, click Next and choose whether you want to CC admins in and then click Send
How to create custom recipient lists
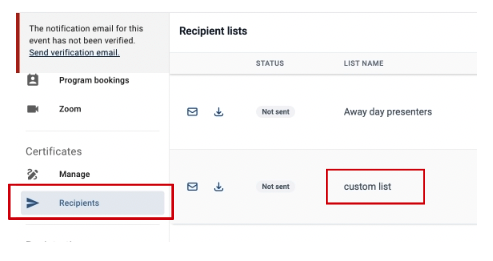
Go to Distribute under Certificates on the left-hand column.
Click on the Create Recipient List button at the top right of the page.
Then fill in the following boxes:
- Select ‘Custom List’ from the drop down box on Recipient group (1)Name the recipient list you’re creating (2)
- Select the certificate you wish to associate the recipient list to (3)
Then click on Next at the bottom of the column.
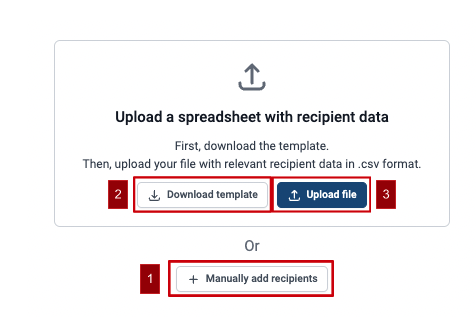
You will now have two options to choose from on the next screen:
- You can Manually Add Recipients (1)
- Or you can fill in a template by clicking on Download Template (2), this will download as a CSV file and all the merge fields you will find on our recipient table will appear as headers in the columns, so you can add your data to these.
When you have done this, you then save it to your computer, go back onto Oxford Abstract screen below and click upload (3).
When your file has been uploaded, all the information will be on a recipient table, (as seen earlier in the article), click Save and then you can edit the table if necessary, following the instructions above.
When you click on the Distribute Tab on the column to the left under Certificates, you will be able to view all your recipient lists, including the custom ones.
Should you need further assistance then, please contact our helpdesk via this Contact Form.