
This information is for Admins ONLY.
You can either watch the video below for a step-by-step walkthrough or scroll down to follow the written instructions.
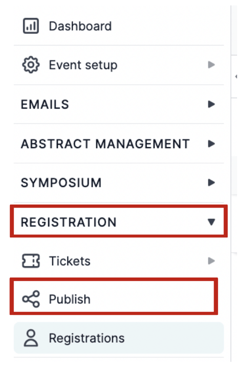
From your main dashboard, navigate to the column on the left, click on Registration → Publish.
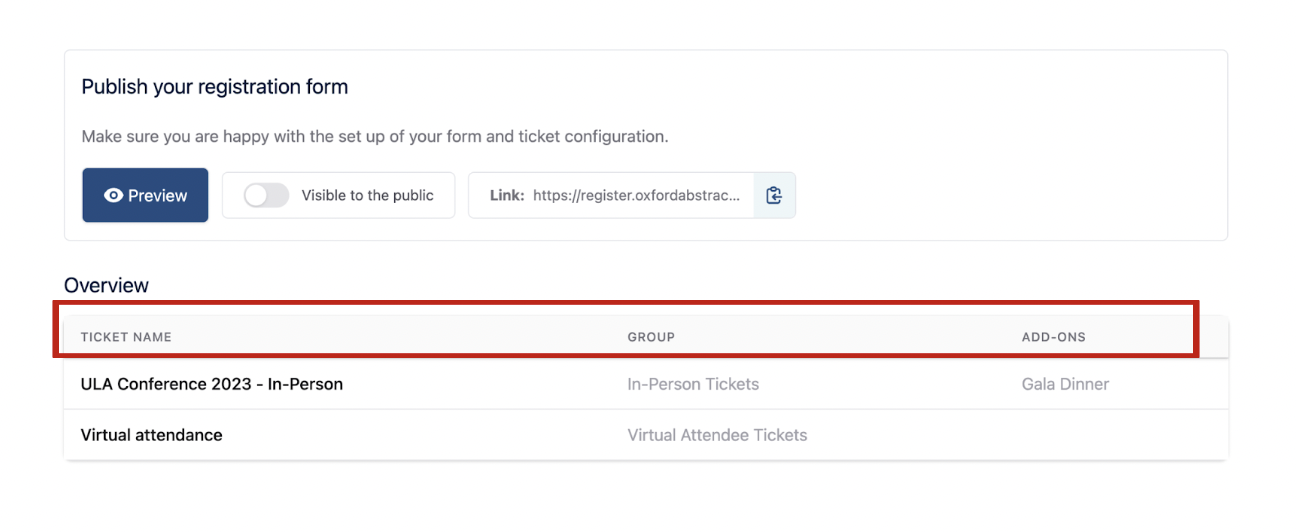
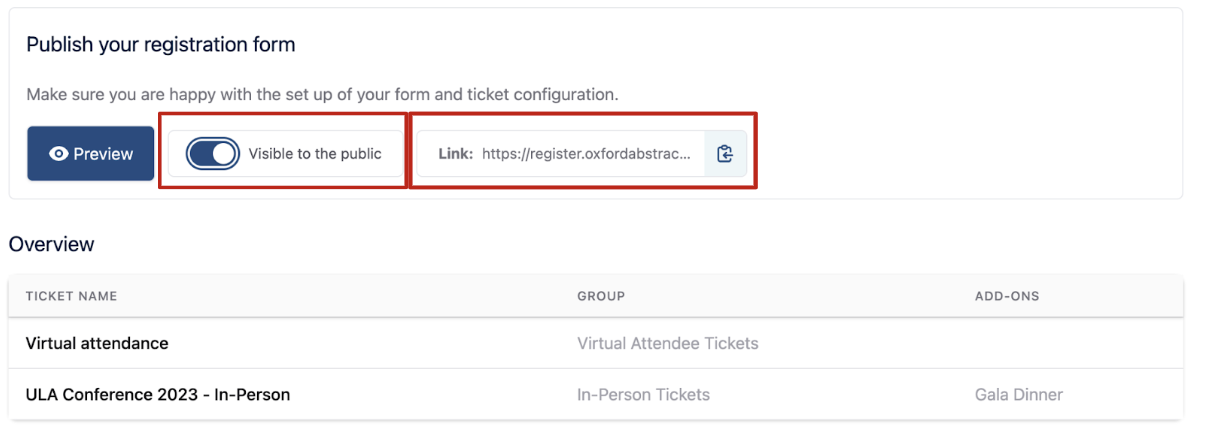
This will take you to your Publish Registration Form Dashboard, where you can view an overview of Tickets, Groups and Add Ons that have been created.
To preview how your event registration will look to attendees, select the Preview button at the top left of the table.
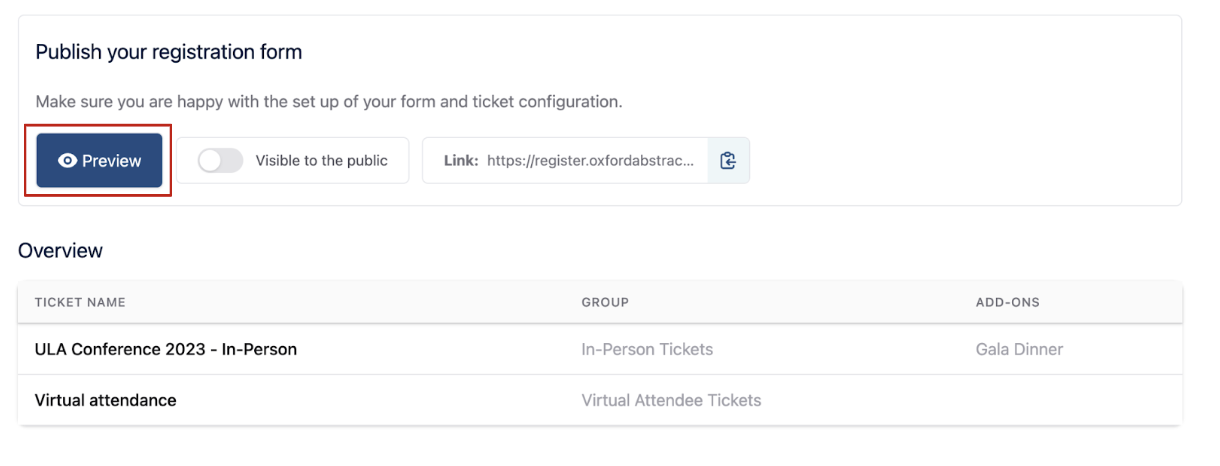
The next screen will automatically open in a new tab on your web browser.
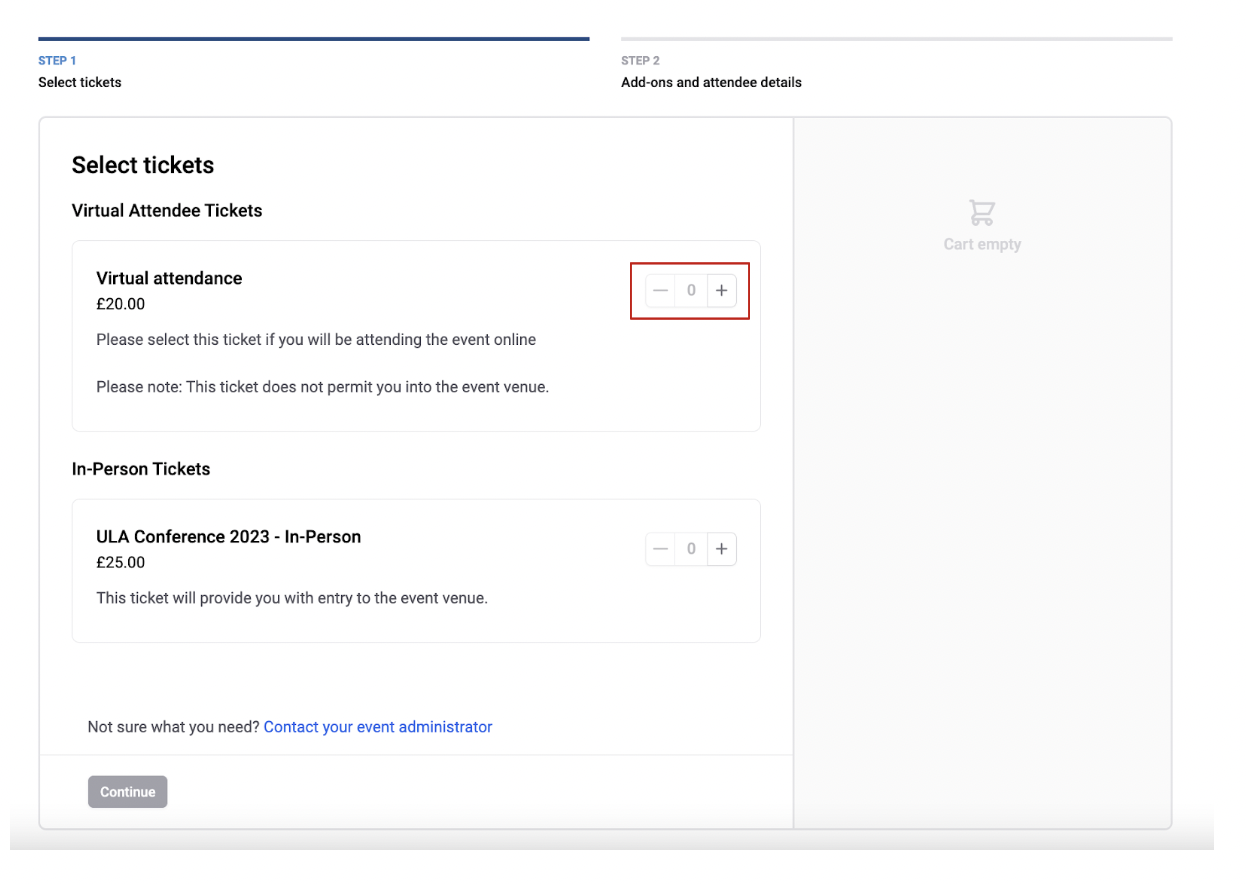
Here you’ll view what the screen will look like to attendees when selecting their tickets. You can, on this preview, click on the Plus buttons to “add” tickets to the cart.
When you have “added” the number of tickets you’d like to “purchase”, you can then click on the Submit Button at the bottom of the page and you will be taken to the second step to view your Add Ons.
Here you can view how the Add-On section will look.
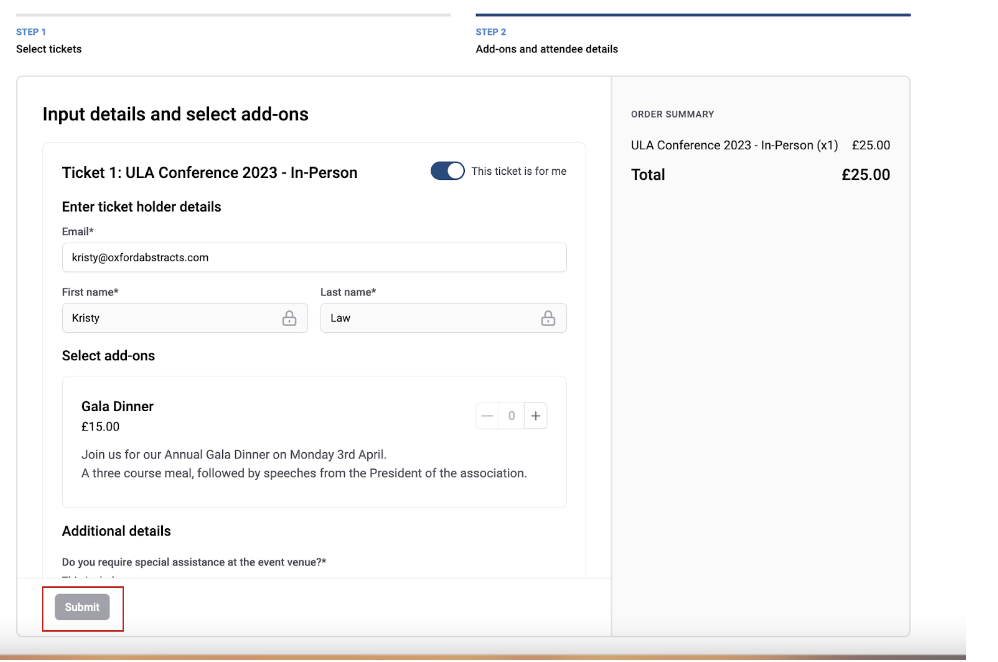
(You can scroll up and down on these pages to view the entire content).
If you’re happy with how it looks, then you can publish your event.
If you want to make changes, you can go back into the Ticket and Form categories found under the Registration title on the left hand menu and make any edits required.
For information on creating/editing Tickets, Groups and Add Ons click here.
For information on creating/editing your Form click here.
To publish your event, click the toggle ON for Visible to the Public.
The link to the right of this toggle is what you need to provide to your attendees to buy tickets etc.
Should you require any further assistance, please contact our support desk via our Contact Form.