
Please note: This information is for Admins ONLY!
You can either watch the video below for a step-by-step walkthrough or scroll down to follow the written instructions.
Skip to :
Billing
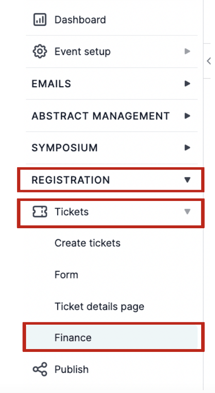
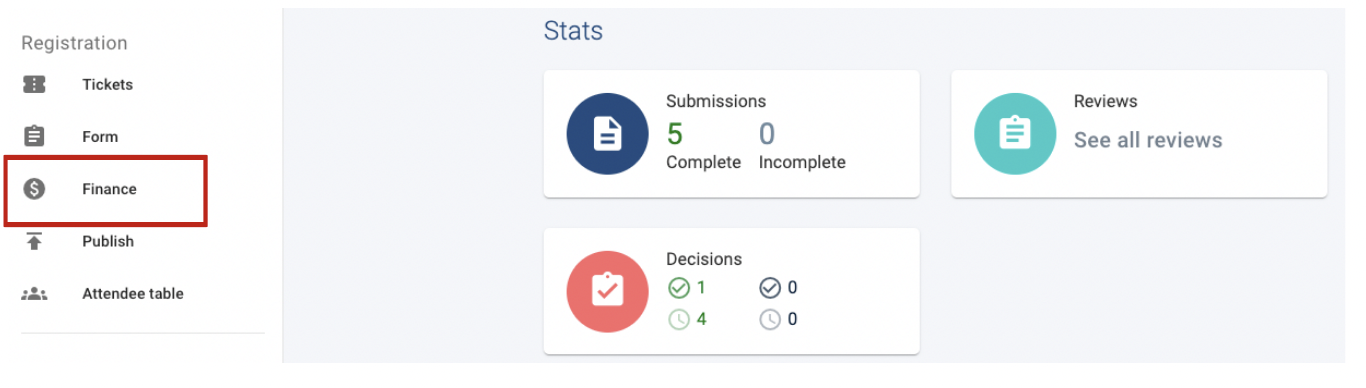
From your main dashboard, navigate to the left sidebar, click on Registration → Tickets → Finance.
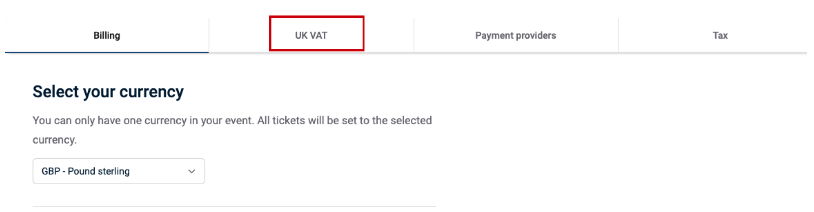
Under the first tab - Billing, you can set your currency (1) and set whether you’d like the Oxford Abstract fee to be included in the ticket price (2) or add it as an additional charge for attendees when they purchase the tickets (3).
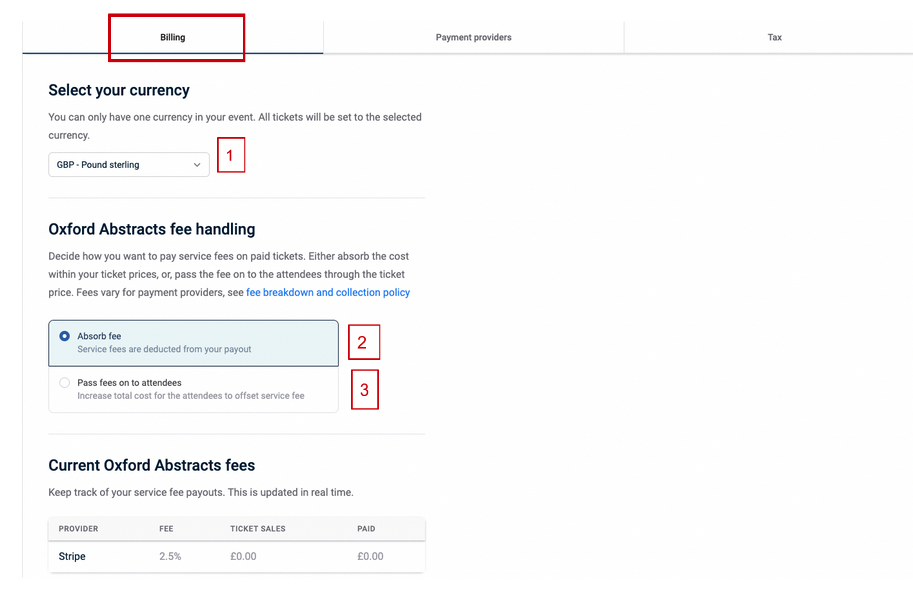
When this is complete, next, select the Payment Providers tab at the top of the page.
Payment Providers
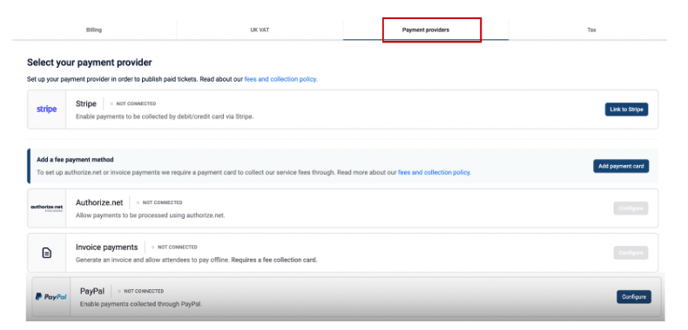
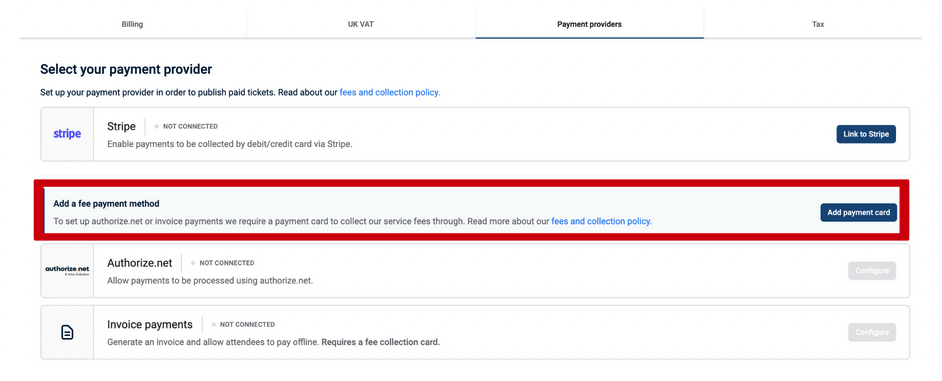
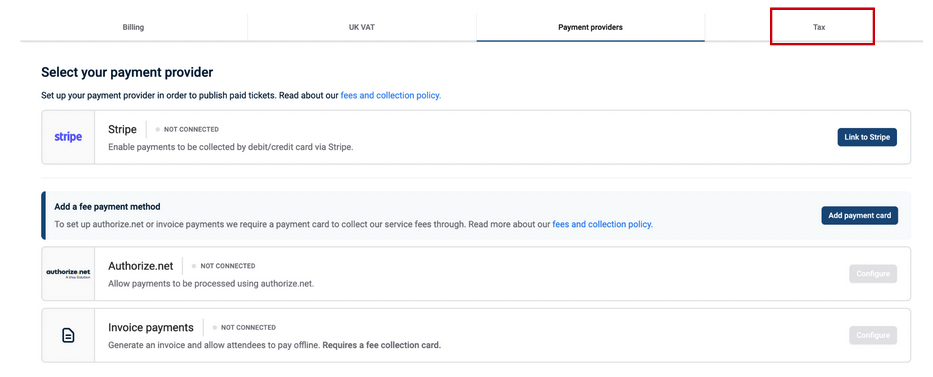
There are five options for you to choose from:
- Stripe
- Paypal
- Payment Link (which will generate a payment link when you send the invoice)
- Authorize.net (For USA clients only)
- Invoice Payment (allowing for payment offline from the software i.e. via bank transfer)
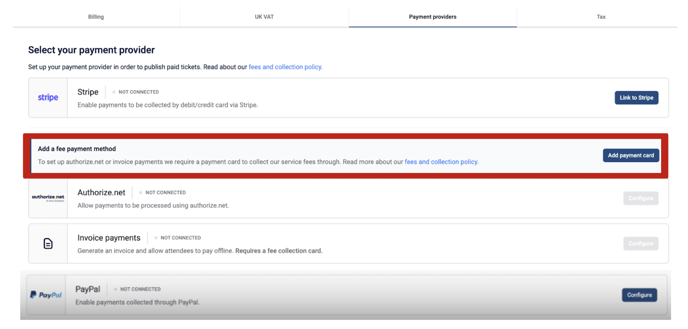
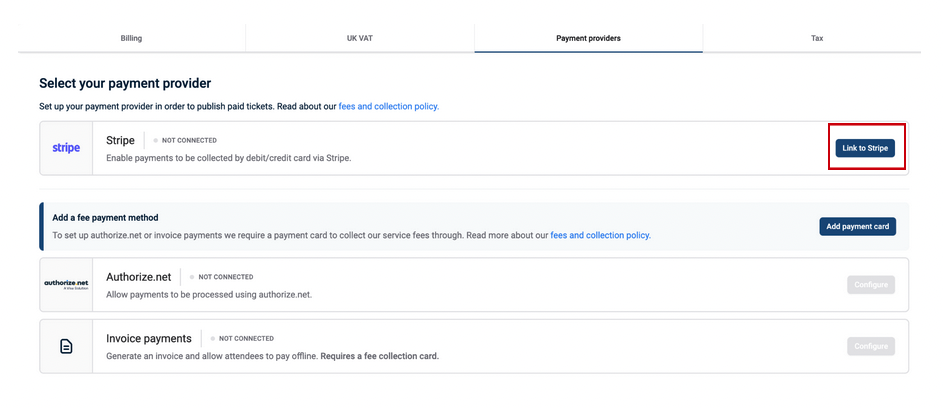
If you wish to use Authorize.net or Invoice Payments, you will need to click on the Add Payment Card on the Add a fee payment method section and follow instructions to add your payment details.
Stripe
To connect your Stripe account, please click on the Link to Stripe button found to the right of the page and follow the instructions.
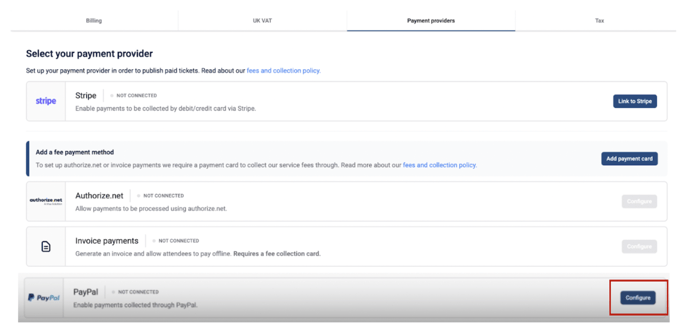
Paypal
To connect your PayPal account click on the Configure button. This will take you to PayPal's login page. All you need to do is log into your account and follow the instructions.
Payment Link
Payment link allows attendees to generate an invoice and pay with debit or credit card later. We will send a payment link with the invoice.
To configure payment links, you will need to have either Stripe or Authorize.net already configured
Once this is done, you select the Configure button on the right-hand side of the page.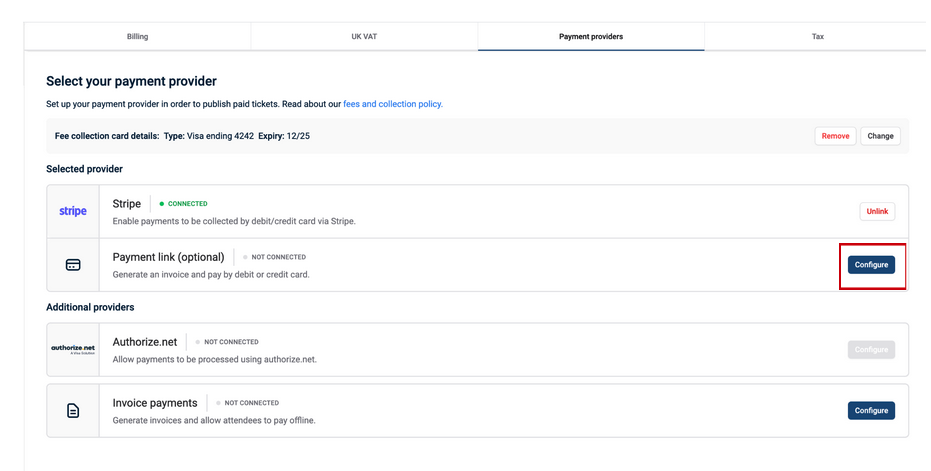
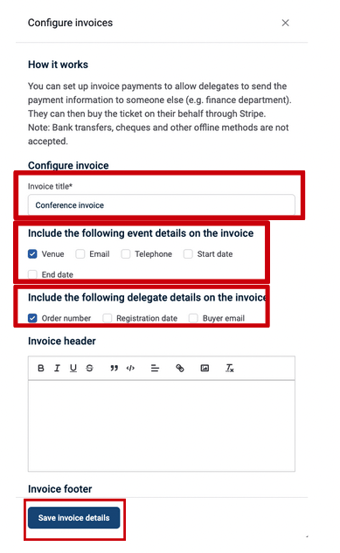
On the next screen, you will be able to add:
- Invoice title
-
- Venue
- Telephone
- Start date
- End date
- Order number
- Registration date
- Buyer email
- An invoice header
- An invoice footer
When completed, please click the Save invoice details button at the bottom of the page.
Authorize.net
To enable this payment method, you’ll need to add your card details first,
Click on the Add Payment Card on the Add a fee payment method section and follow instructions to add your payment details.
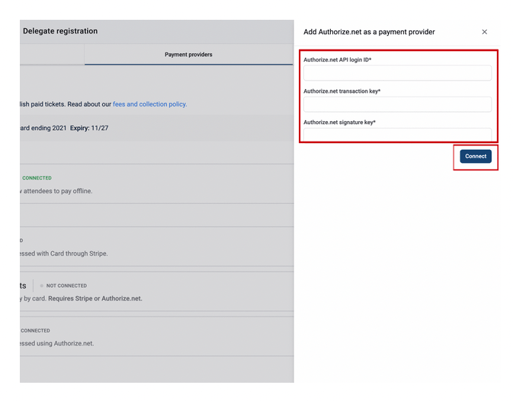
When this is done, you’ll be able to select Authorize.net by clicking on the Link Authorize.net button to the right of the page.
You will then have to complete the following fields:
- Add your Authorize.net API Login ID
- Add your Authorize.net Transaction Key
- Add your Authorize.net Signature Key
Then click the Connect button.
Invoice Payments
Invoice payments allow customers to pay for their tickets via bank transfer.
Please note that these transactions will need to be marked as paid manually on the platform.
Before setting up this payment method, you’ll need to add your card details first.
Click on the Add Payment Card button under Authorize.net and follow the instructions to link your card.

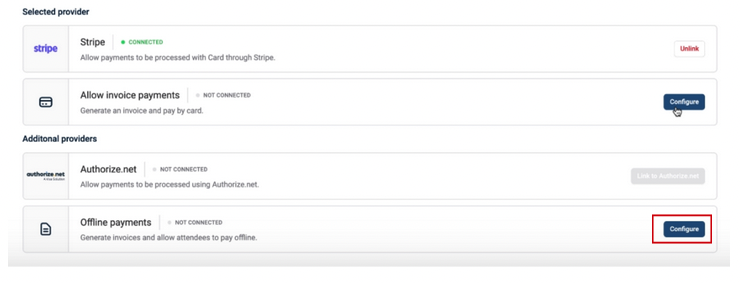
To enable Invoice Payments, click on the configure button to the right of the page.
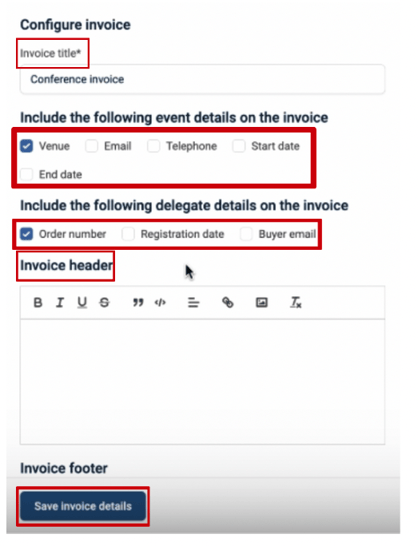
On the next screen, you will need to complete the following fields:
- Invoice title
Include any of the following event details on the invoice by ticking the relevant boxes
- Venue
- Telephone
- Start date
- End date
- Order number
- Registration date
- Buyer email
- An invoice header
- An invoice footer (this is where you will add the offline payment instructions i.e. bank details for customers to send their payment to.)
When completed, please click the Save invoice details button at the bottom of the page.
How to add Tax
Select the Tax tab at the top right of the page
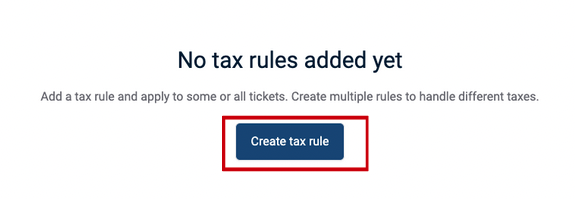
Then select the Create Tax Rule button.
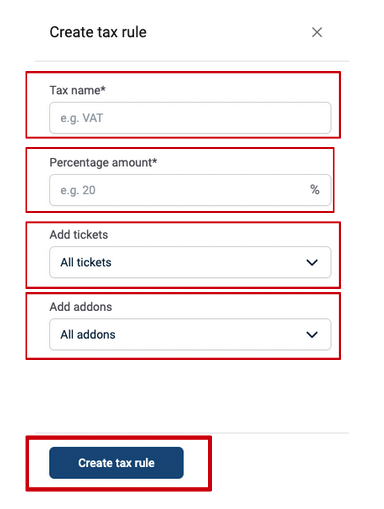
Then complete the following fields:
- Add the Tax name
- Add the percentage amount
- Select which tickets you would like to apply it to via the drop-down bar
- Select which Add-ons you would also like to add tax to via the drop-down bar
When complete, click on the Create Tax Rule button at the bottom of the page.
UK VAT
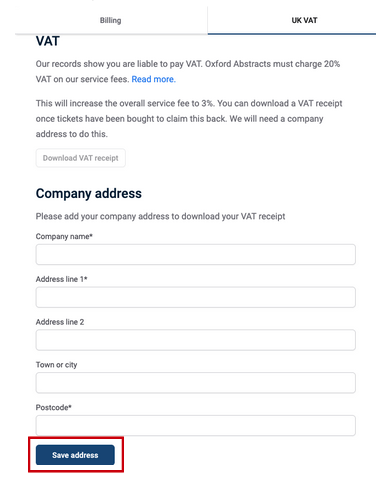
If you are a UK-registered company, Oxford Abstracts will charge a 20% VAT charge on our service fees.
You can download service fee VAT receipts from the ‘UK VAT’ tab.
To create your VAT Receipt, we need you to add your company address.
To add your company address, click on Finance under Registration in the left-hand column from your main dashboard.
Click on UK VAT tab at the top of the page.
Then add your company’s address and click on the Save Address button at the bottom of the page.
Fee Invoice Downloads
You can now view the different fees collected by Oxford Abstracts in two tables.
Table one shows the fees collected at point of transaction for the payment provider and table two shows the fees collected for offline invoices.
Both of these you can download monthly or all time invoices.
To view these tables go to the left-hand menu, click on Registration → Tickets → Finance
Under the Billing tab scroll down to Current Oxford Abstracts Fees.

The Collected at point of transaction table shows the fees collected at point of transaction for the payment provider.

The Collected monthly from card (e.g. visa ending 1111) shows the fees collected for offline invoices.

To download the monthly or all time invoices click on the Download Receipts button under both tables and make your selection.

Should you require further assistance, then please get in touch with our helpdesk via the Contact Form.