
Choose from an unlimited number of fee structures and set different timeframes – eg, for Early Bird tickets.
The guidance below is for event administrators/ organisers. If you are an end user (eg. submitter, reviewer, delegate etc), please click here.
The key difference between conference ticket and conference event questions is that for tickets, the delegate can only choose one option. For conference events, they can choose as many as they like. For the purposes of this help file, the first option - conference ticket has been used.
Go to Event dashboard → Registration → Delegate form
Skip to
The fees / tickets and events questions appear at the bottom of the form. You'll notice checkboxes to the right of the questions. These enable dependency questions (ie - if a user picks a specific choice, a new question will appear).
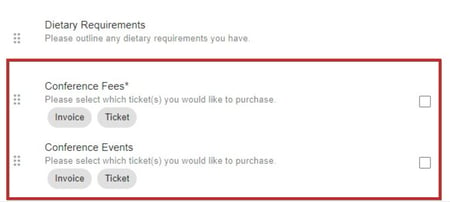
Begin by clicking on the Conference Fees question.
1) This is the type of question - ie - a radio button format
2) Enter the name of the ticket and 3) the description
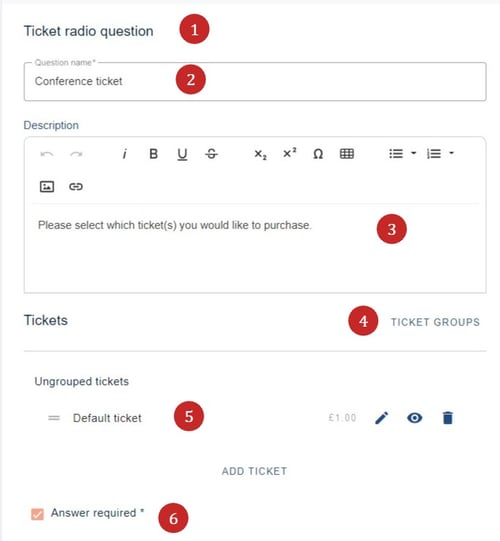
4) If you have groups of tickets - eg, you would like to list all those that are for members, click on Ticket Groups to create your groups.
5) Default ticket, which you can amend to your requirements, or click Add Ticket to start from scratch
6) Check this box to make a response mandatory.
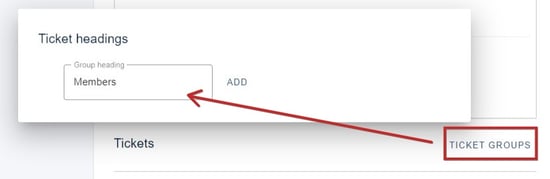
Ticket groups
Click on Ticket groups, enter your group heading and click Add
This will then appear as a heading under the Ungrouped tickets section. 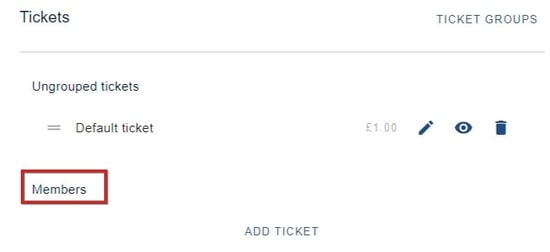
Creating a ticket
You can begin to add ticket details by either clicking the edit icon or by clicking Add ticket under your group heading to create a new one. Both options will reveal the same panel (below - Creating a ticket)
NB: The two icons to the right of the edit icon are:
Eye icon - enables the visibility of the question and (if enabled) add coupons
Bin icon - deletes the question.

Creating a ticket
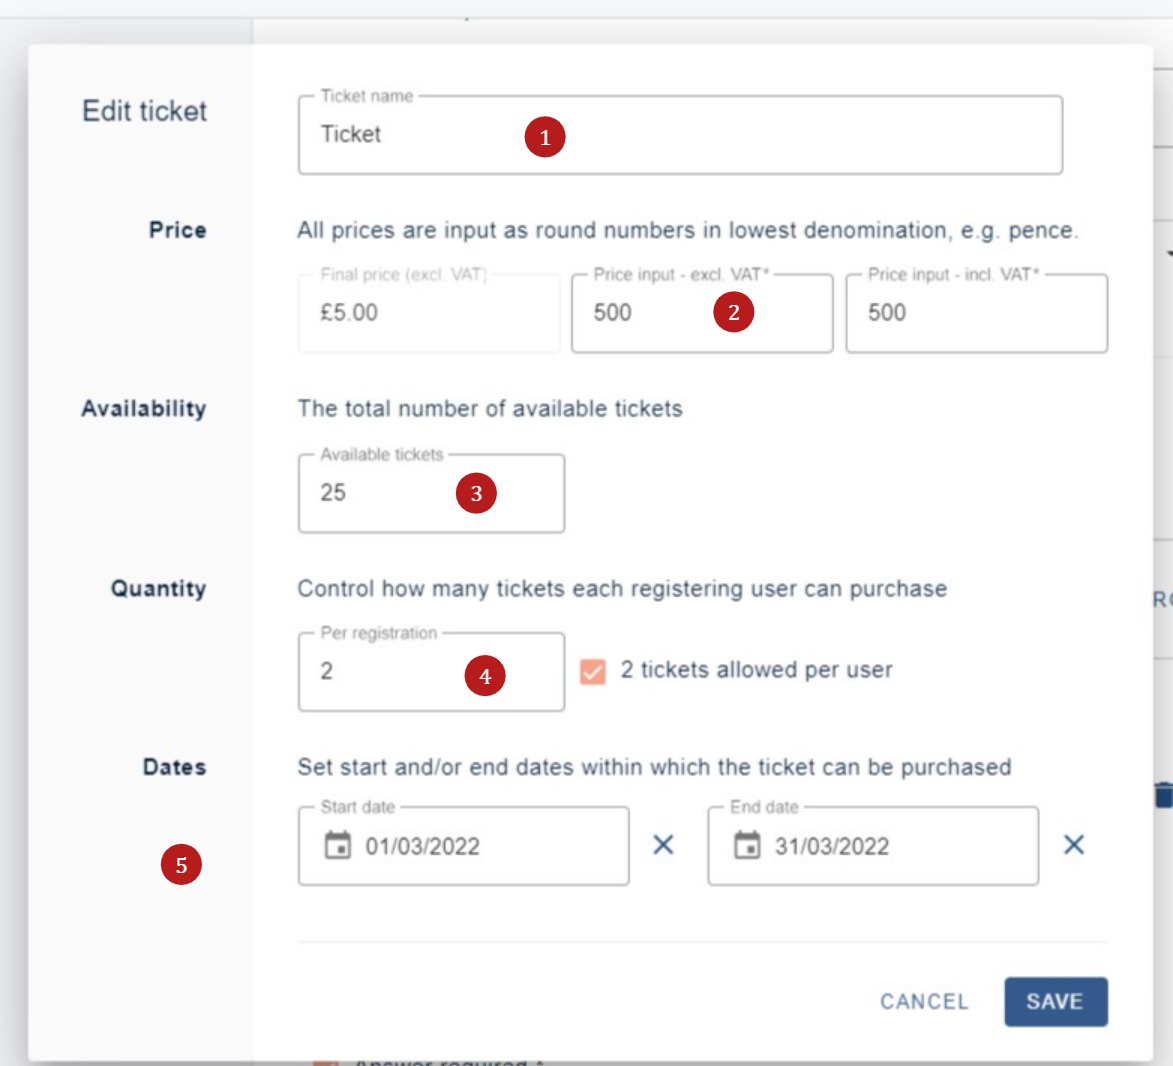
After making your choice from the options above, you will see the panel below appear
1) Enter ticket name here.
2) Enter price in the middle field in lowest currency unit. Currency and VAT will be determined when setting up delegate registration.
3) The default is unlimited so enter the maximum available quantity if there is one.
4) Enter a figure if there is a maximum anount of tickets a delegate can purchase.
5) Enter the dates of the time frame the items will be on sale for - eg Earlybird tickets.
The tickets will be only viewed by users in the times allocated, and will be marked as Sold out when the total quantity has been sold. Click save to retain your settings.
NB: Do not delete items when they are no longer available.
Continue adding as many groups and tickets as you need.
Coupons
Coupons are typically used for tickets that should only be available to a chosen group of delegates. For instance - you can create a free ticket, by setting the price to '0'. Create a code and then send the code to the delegates whom you wish to be able to select the free ticket.
To create coupons, see Setting up delegate registration
To link coupons to tickets, click on the eye icon next to your chosen ticket and select the relevant coupon.
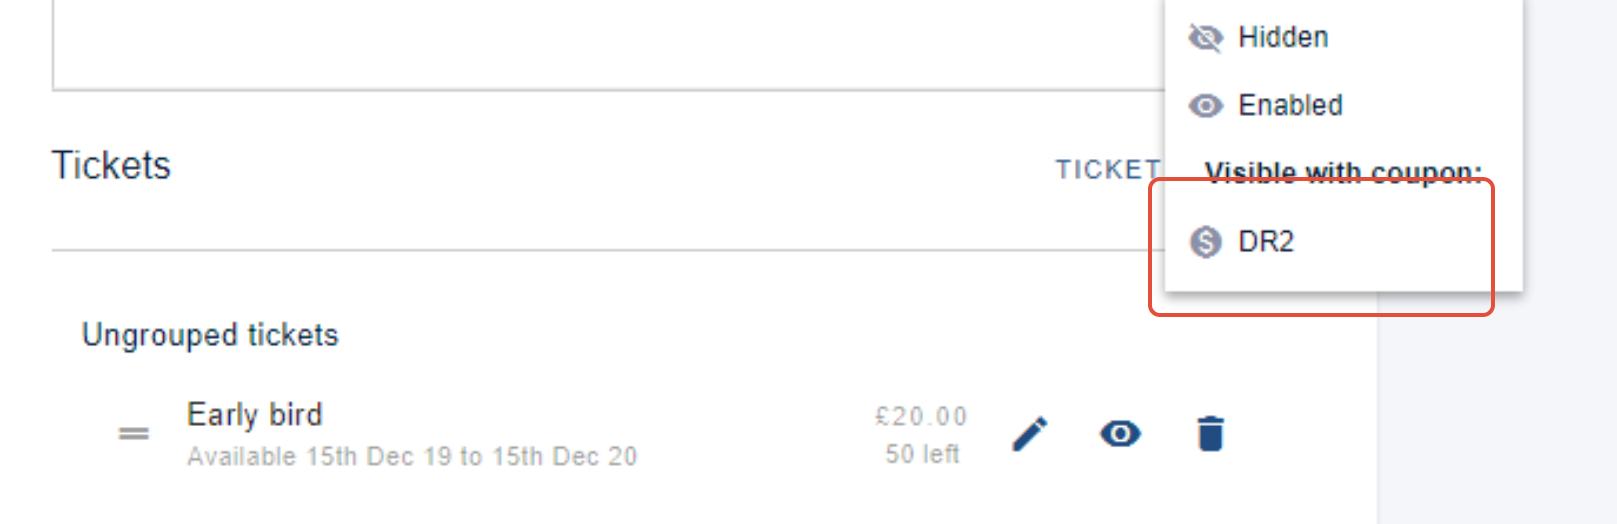
On the form, delegates will be asked to enter the code. When they do, the ticket will be revealed, and remain hidden to any other user.
