
The guidance below is for event administrators/ organisers. If you are an end user (eg. submitter, reviewer, delegate etc), please click here.
NB: the email facility is not available in all tables. The submission table has been used in the example below, so it is advisable that you are familiar with The submission tables before you read this guidance, along with Amending email templates.
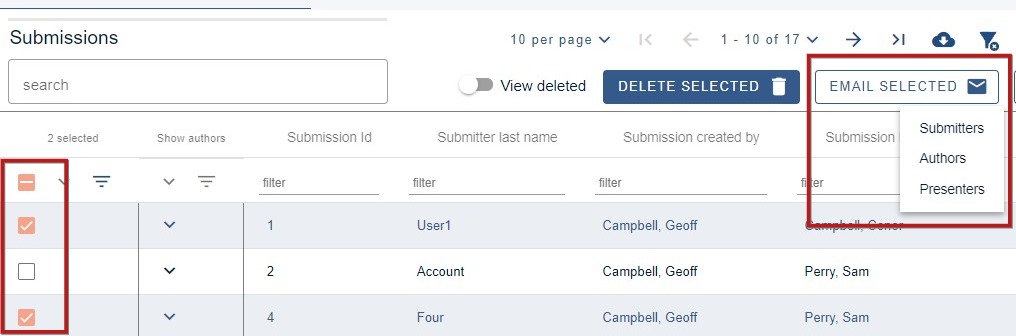
Go to Event dashboard → Abstract Management → Submissions → Table
1) Select the rows of the submitters that with you wish to contact
2) Click the Email selected button. Choose the relevant group (for clarification on each of these roles, please scroll to the explanation at the end of this article.
This will open a panel, where you can begin to configure your email, and confirm the recipients.
The first view will show you a list of the associated emails. You can search for specific recipients, clear all selected or uncheck the boxes of individual recipients if you do not want to include certain email addresses.
If you have any email templates saved you will also be able to access them from this screen. or you can click Create new email.

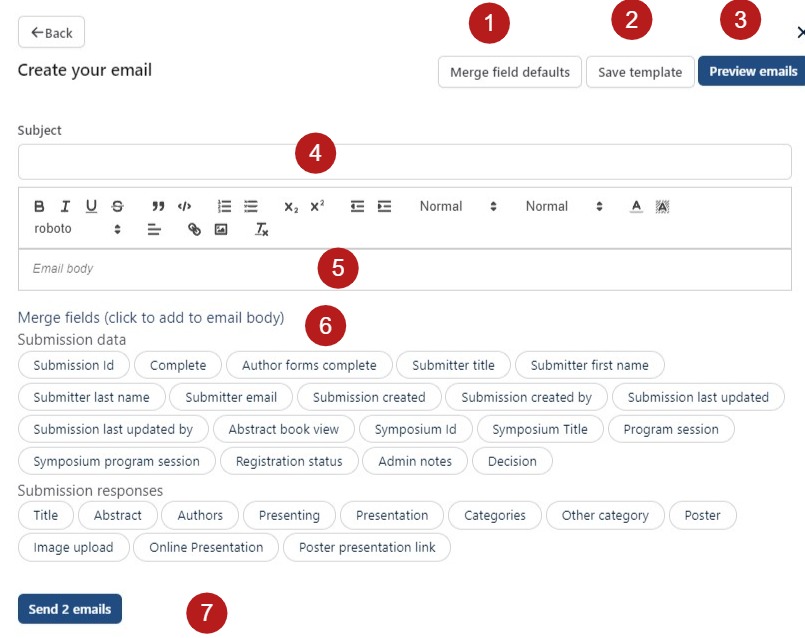
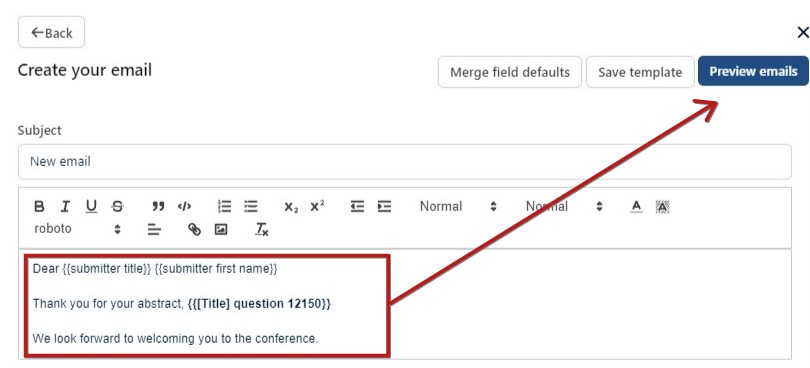
Along the top right there are the following options:
1) You can set the merge field defaults
2) Save your email as a template
3) Preview your email as a specific recipient
4), 5) and 6) Create the content of your email as you would when Amending email templates
7) Send the email(s)
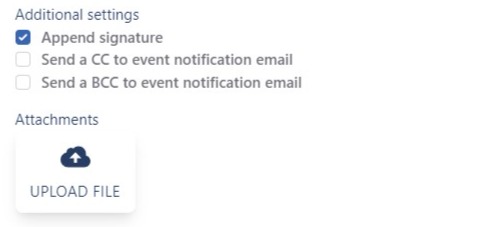
Lower in the panel, there are further options, as with the standard email tool. See Additional settings for guidance.
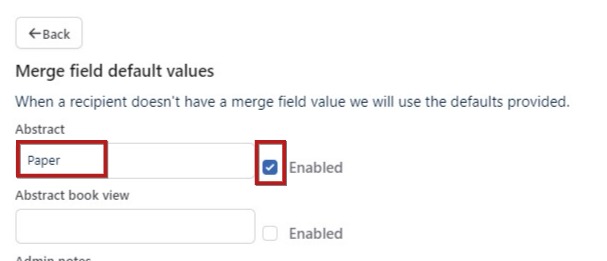
1) Merge fields
Clicking on the merge field defaults will allow you to enter your own terms to overwrite the default value.
In the following example, 'Paper' has been entered where 'Abstract' would normally appear, and been enabled. This means that where a recipient doesn't have a value for 'Abstract' (ie: the abstract question hasn't been answered), the word 'Paper' will appear instead.
To see how this will look, click on preview and then choose a recipient.
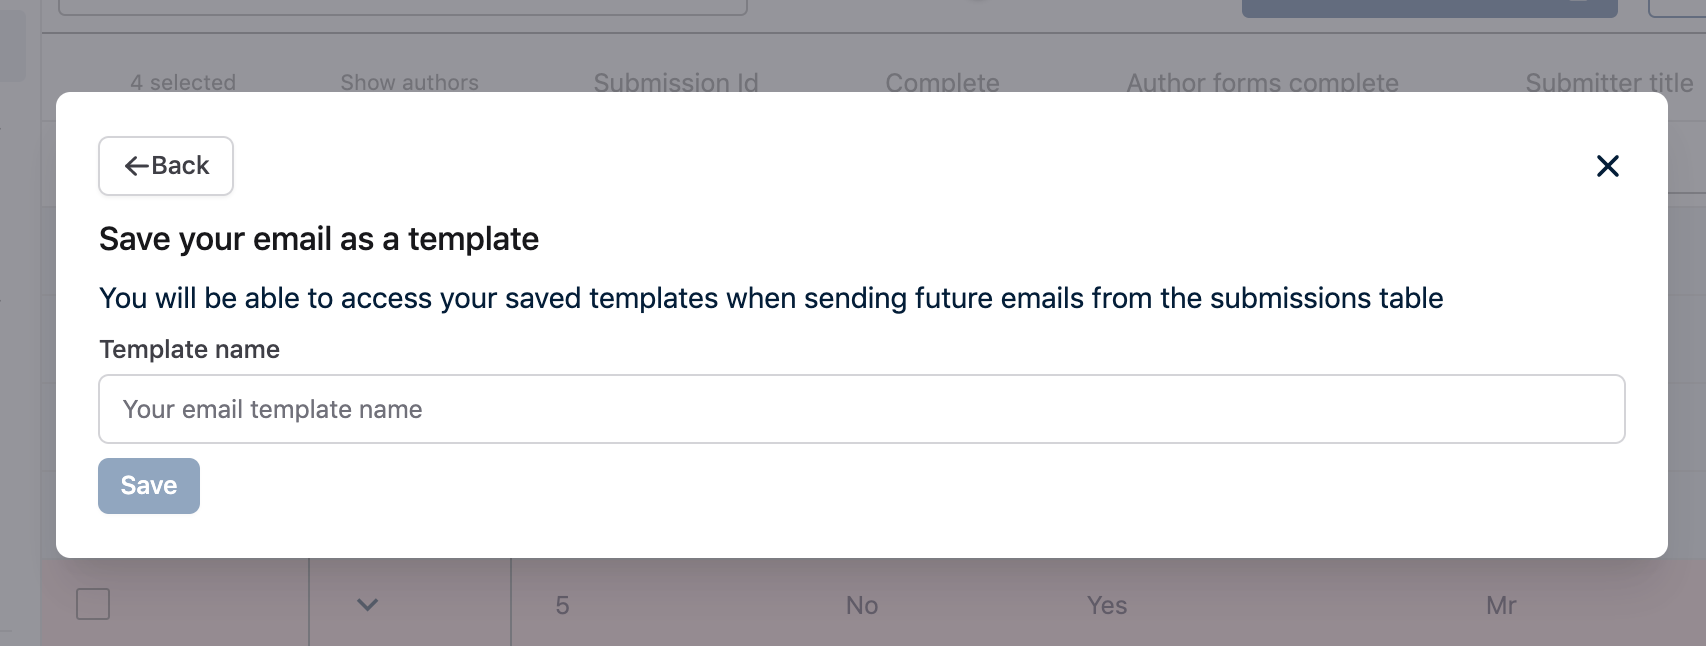
2) Templates
If you choose to save your email as a template, you will be prompted to give the template a name. Enter your chosen name in the field and click Save. You will then be able to access your template in the first step of creating your next email, should you wish (as above).
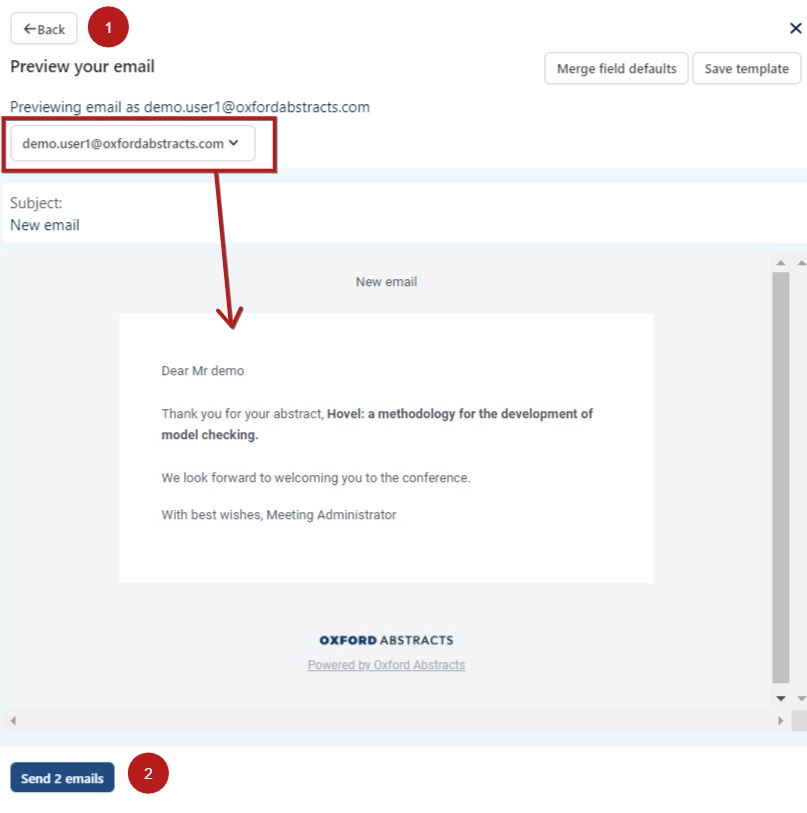
3) Previewing your email
Before you send your emails, you can preview how they will appear to the recipients.
By clicking Preview emails, the text and merge fields below...
Will appear like this for the selected recipient.
You can click 1) Back to amend, or 2) Send
NB: Clicking Send will result in the emails to all selected recipients being sent, not just the previewed email.
Submitters: There can only be one submitter for every submission. These are the people completing the submission form.
Authors: Authors are listed by submitters in the authors and affiliations question. The author is often the submitter, but often multiple authors are allowed.
Presenter: Presenters can also be the same as both the submitter and the author, but often only one presenter is allowed where there are multiple authors. These are tagged in the authors and affiliations question, and will be denoted in bold or underlined in the program and abstract books.