
Learn how to automatically assign submissions to reviewers.
This information is for Admins ONLY!
Skip to:
How to automatically assign reviewers
How to search for a submission
How to Re-Run reviewer allocation
What does the yellow exclamation mark mean?
How to view and adjust parameters
Download information as a CSV file
How to email reviewers notifying them of their submission assignments
How to automatically assign Reviewers
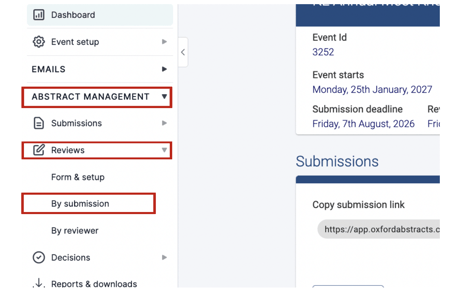
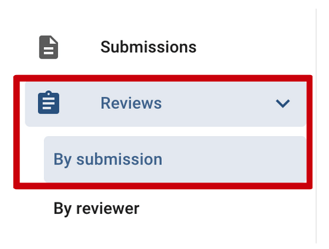
From your main dashboard, go to the left-hand column and select Abstract Management → Reviews → By Submission.
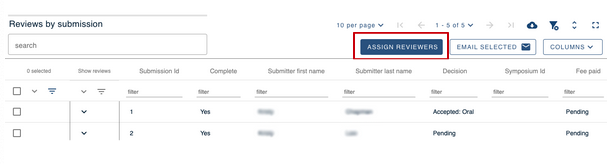
On the next screen, click on Assign Reviewers at the top of the table.
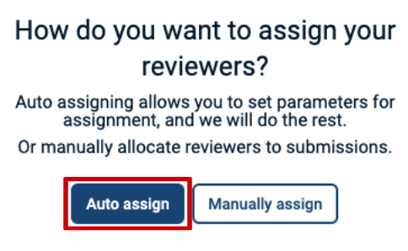
On the next screen, you can decide if you want to assign the reviewers automatically or manually.
Click the Auto Assign button.
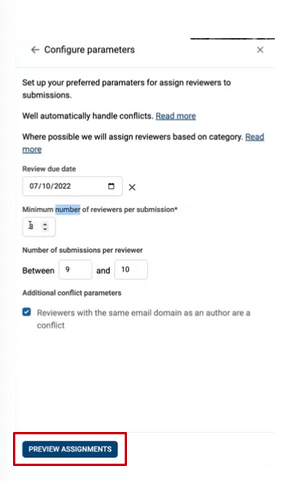
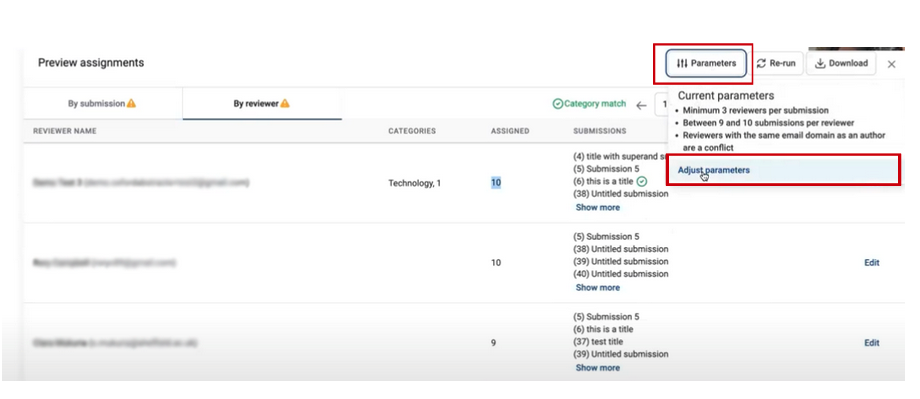
On the next screen, you can set your preferred parameters to automatically assign reviewers to submissions. (See picture below).
Here you input:
- The review due date
- The minimum number of reviewers per submission
- The number of submissions per reviewer.
- Tick box if reviewers with the same email domain as an author are a conflict.
Then click Preview Assignments at the bottom of the screen.
The system won’t assign a reviewer to a submission if they are an author or co-author of the submission to help prevent a conflict of interest.
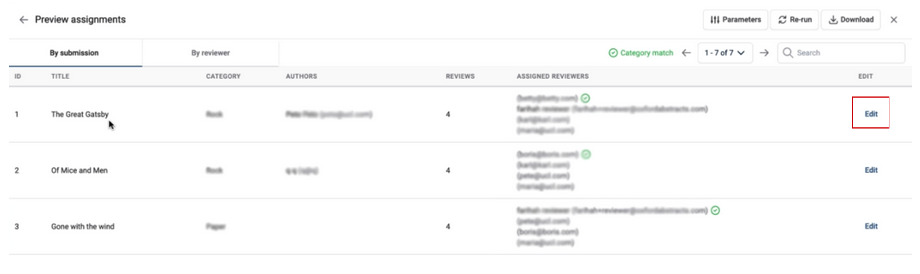
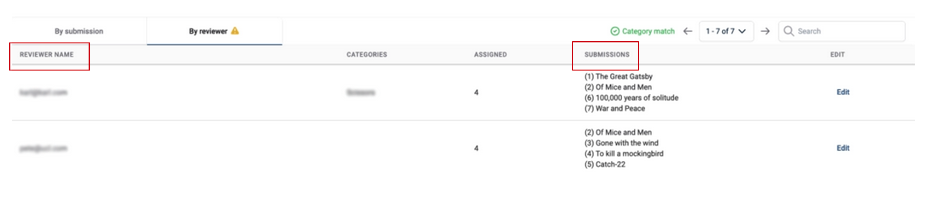
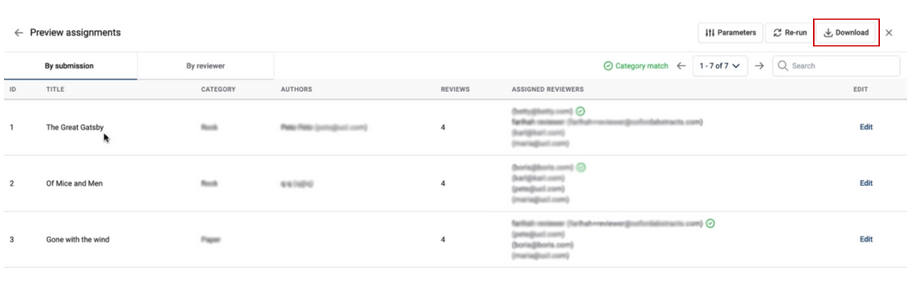
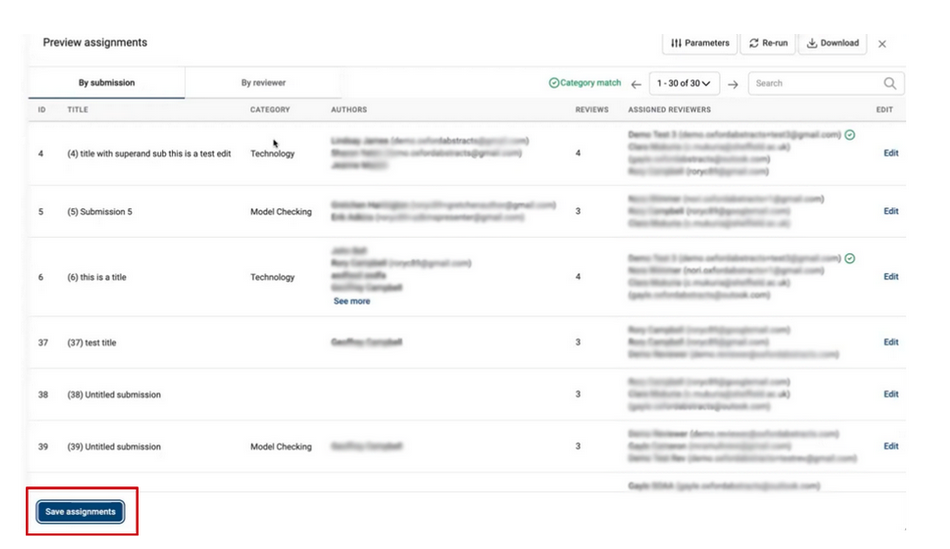
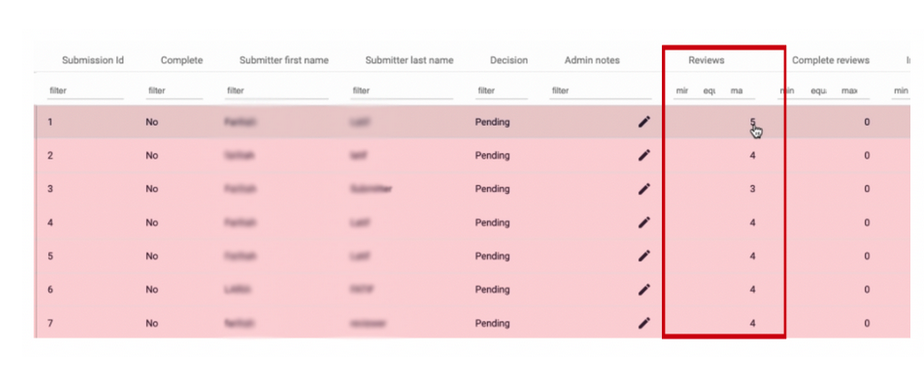
Next, you’ll see the table with all the submissions assigned to a reviewer/s.
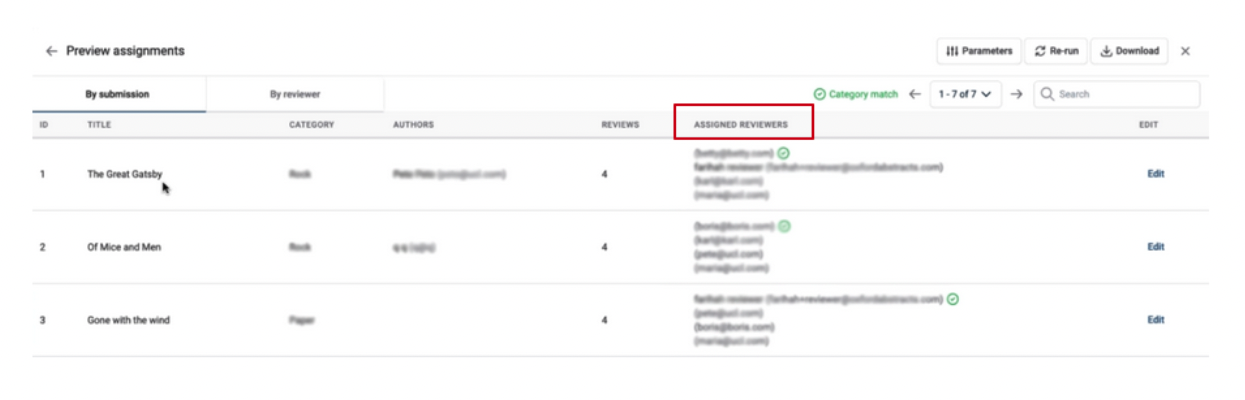
Search for a Submission
To search for a submission, you can type either the Title, ID or Category into the search bar at the top right of the table.

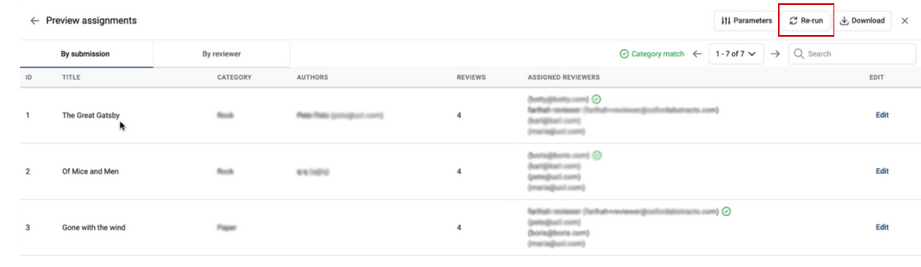
How to Re-Run reviewer allocation
If you would like to “Re-Run” the automation so different reviewers are randomly assigned to the submissions, then click on the Re-Run Button at the top right, above the table.
What does the yellow exclamation mark mean?
If a yellow exclamation mark appears on the Reviewer Tab at the top of the table after adding reviewers or re-running reviewers, this indicates that parameters you set have not been matched.
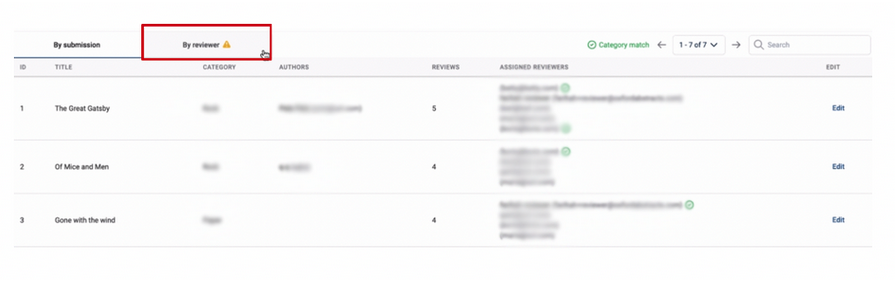
Click on the Reviewer Tab, and you’ll find the exclamation mark next to the compromised submission, which has also been highlighted yellow.
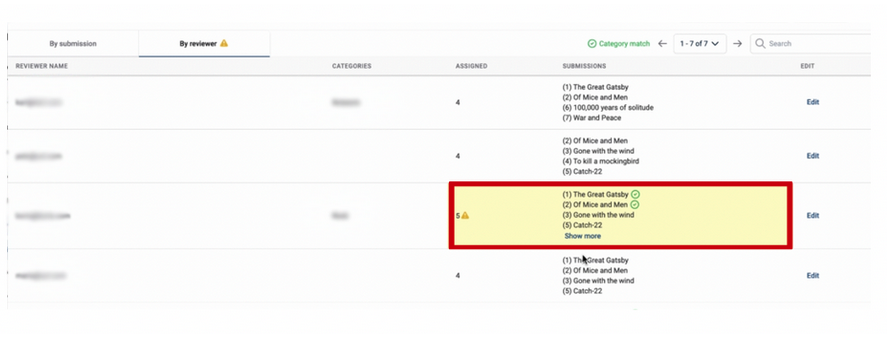
For this example, you can see there are too many reviewers allocated to this submission.
You will need to delete a reviewer or an “x” amount to meet your set parameters i.e. 3 reviewers per submission.
How to add and delete specific reviewers
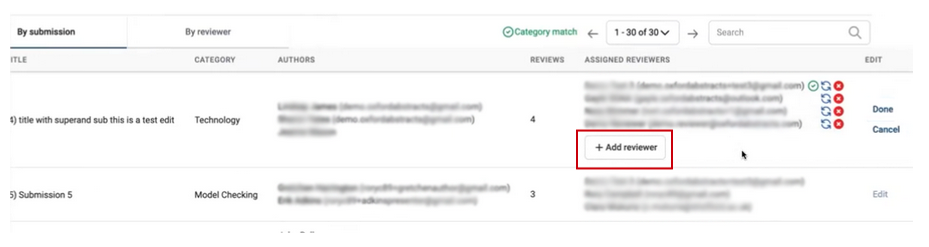
You can also add/delete specific reviewers to specific submissions by clicking on the Edit button at the end of the row of a submission.
Deleting a Reviewer
If you want to delete a reviewer from a particular submission, click on the ‘x’ next to their name and click Done.
If you click the blue arrow next to the ‘x’, it will randomly add another reviewer.
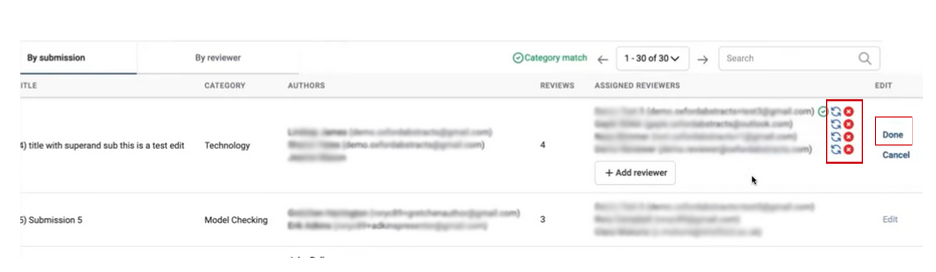
Adding a Reviewer
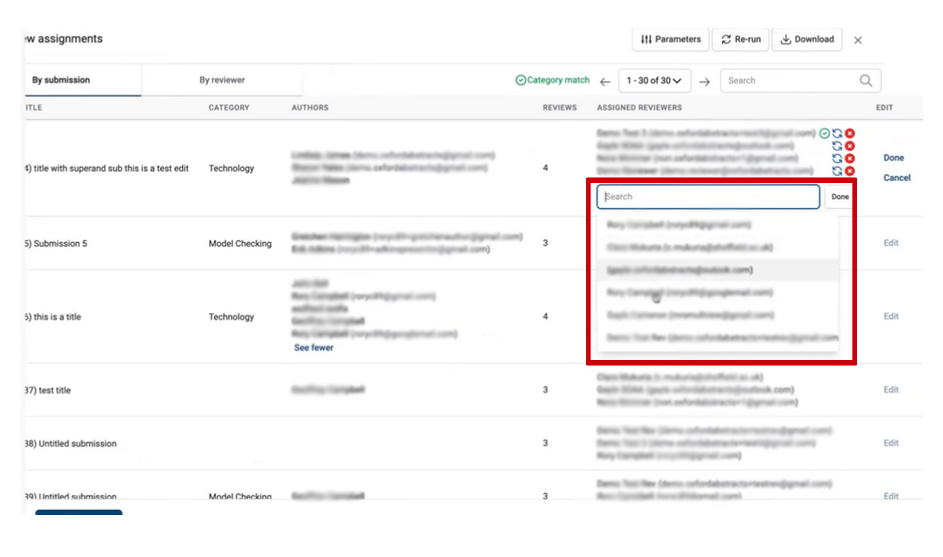
If you want to add a reviewer, click on +Add Reviewer.
Then type in the search bar the reviewer's name or select from the drop-down box, and click Done.
Next, you can go to the Reviewer Table to see what submission each reviewer has been allocated and how many submissions they have assigned to them.
How to View and Adjust Parameters
To view and adjust your parameters, click on the Parameters button at the top right of the table.
To make any changes click Adjust Parameters from the drop-down box.
To make edits, follow the instructions above - it’s the same procedure.
Download Information as a CSV File
You can download all the information as a CSV file by clicking on the Download button at the top right of the table.
Save Assignments
Once you are happy with the reviewer assignments, you need to click on Save Assignments at the bottom left of the page.
Please note once you have assigned these, you cannot automatically Re-Run and reassign the submission to different reviewers.
You will then see the next screen, saying reviewers have been assigned submissions.
Please note: Emails to notify reviewers of their assigned submissions ARE NOT AUTOMATICALLY SENT.
If you would like to notify reviewers, then please click on Go To Emails.
If you do not wish to send emails, click finish at the bottom left of the page.
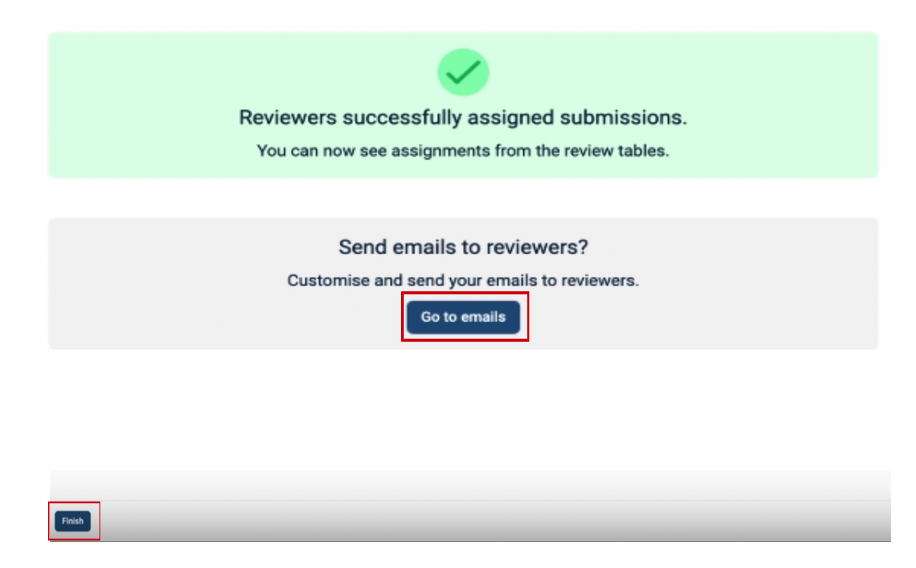
If you click on Go to Emails, this will take you to the Email tab (on the left-hand column) where you can then notify reviewers of their assigned submissions.
For instructions on how to do this - please read the following Knowledge Base article.
Once you have assigned the reviewers, you can then click on the Review tab on the left-hand column and select submission.
This table will show you how many reviews there will be for each submission.
Should you need further assistance, then please contact our Support Desk via our Contact Form.