
When using the Oxford Abstracts Delegate Registration feature, you will be able to use the check-in feature.
You can either watch a short video explaining the Check-In feature and how to use it, or continue reading the step-by-step instructions below,
Skip To:
How to Manually Check-In Attendees
How to Scan an Attendees Ticket to Check Them In
How to Open & Close the Check-In Desk
How to Send QR Codes to Existing Attendees
From your Dashboard, click on the Registration tab on the left-hand menu and from the drop-down click on Check-In.
On the main Check-In page, if it is your first time looking, you’ll see guidance on how to use this feature.
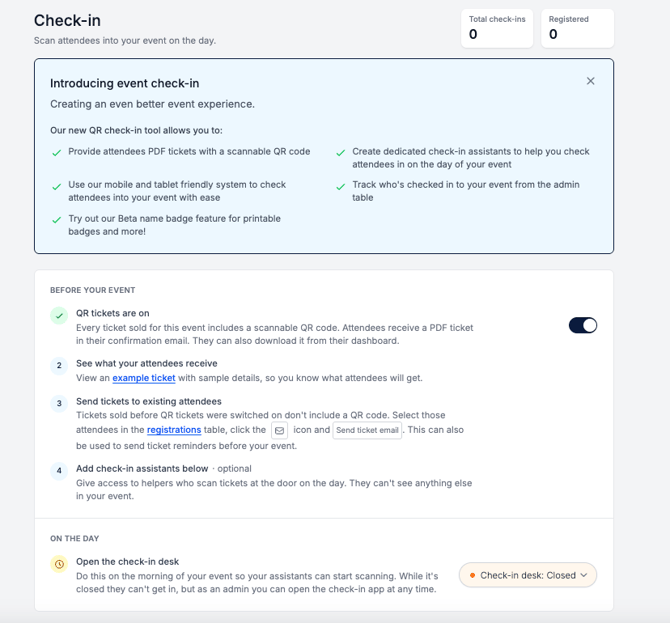
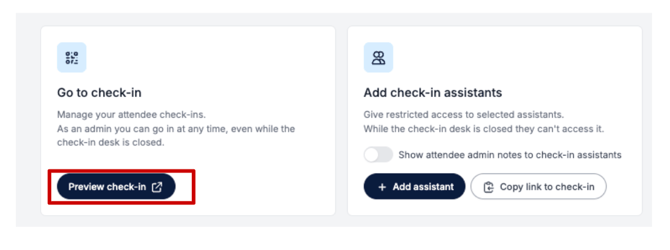
Scroll down to Go to Check-In and click the Preview Check-In button.
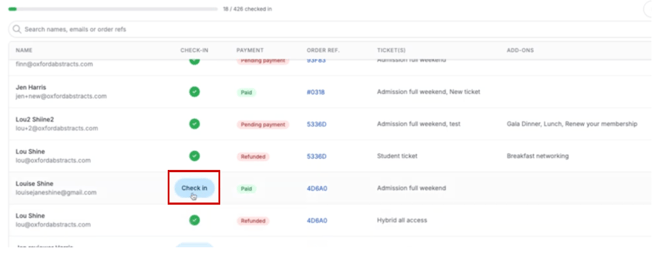
On the next page, you will see all the attendees that have purchased tickets to your event, and you can see if they have paid, what type of ticket they’ve purchased and if they have any add-ons.
On this table, you'll be able to scan attendees tickets or manually check in them in.
How to Manually Check-In Attendees
Simply find their name and click on the ‘Check-In’ box to the right of their name.
A green tick will appear when this has been done.
How to Scan an Attendee's Ticket to Check Them In
At the bottom right of this table, click on the Scan Ticket Button.
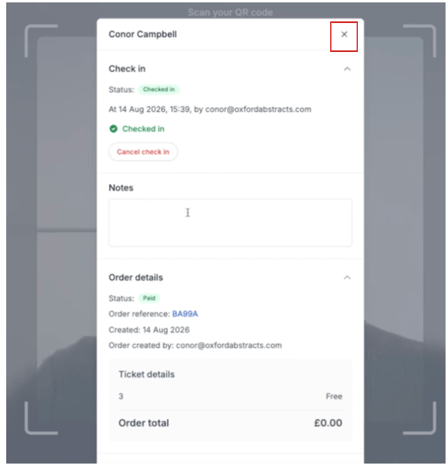
This will open up the camera on your phone, tablet, laptop, whichever you are using and allow the attendee to zoom in on their ticket’s QR code on their phone for example, show the QR to the camera, ensuring it fits within the box and the camera will automatically scan it and check in the attendee.
The attendees ticket information will pop up on the screen, when you are finished with this all you have to do is click the X at the top right of the screen, and it will return you to the check-in table and there will be a green tick next to the attendees name showing they are now checked in.
How to Open & Close the Check-In Desk
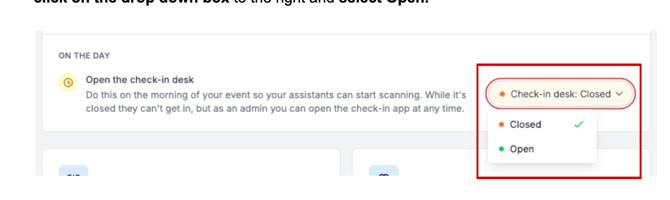
On the day/days of your event you’ll need to “open” the check in desk.
To do this go to the main Check-In page and scroll down to Open the check-in desk, click on the drop down box to the right and select Open.
How to send QR codes to attendees that bought tickets before your event had the QR code Check-In feature
If attendees have bought tickets before you set up the Check-In feature, you can resend their tickets with the QR code on them.
To do this, you need to go to the Registration tab on the left-hand menu and click on the Registration Table from the drop-down.
Then select the attendees you want to resend their tickets to by clicking on the box to the left of their name and then clicking on the email button found at the top right of the table and selecting Send Ticket Email.
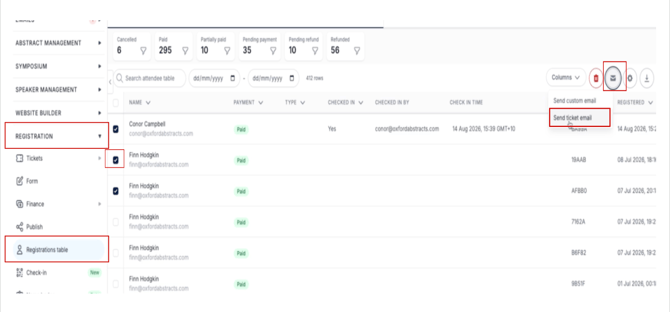
On the Registration Table, you’ll also be able to see if an attendee has checked in, who checked them in and what time they checked in.
If you need any further help, please contact our Support Team via the following form.